Posted in Games Workshop, Middle-Earth, Miniatures games, Strategy games, Team games, Tournament, Wargames

Side by Side with a Friend 2024 tournament report

Another joint blog entry you lucky devils! Minitrol (MT) and PhantomNuisance (PN) decided to attend Side by Side with a Friend again this year off the back of a great event in 2023 in Ōtautahi – Christchurch.

Billed as “Christchurch’s largest doubles Middle Earth SBG tournament” we were looking forward to a fun weekend of games and camaraderie. Army composition for Side by Side is two 400 point forces, with each of those forces coming from the same army list (or Legendary Legion), meaning each teams’ total force can only be comprised of maximum two factions.

MT: We really enjoyed list crafting last year coming up with a force dripping in
theme by using the Cirith Ungol Legendary Legion and resulting in me
painting two forces or fun unique models. However, this year due to a
combination of life and, well life, I had less time and we decided to work with
our existing forces and add some fun units I could paint in my one weekend
before the event I had free.

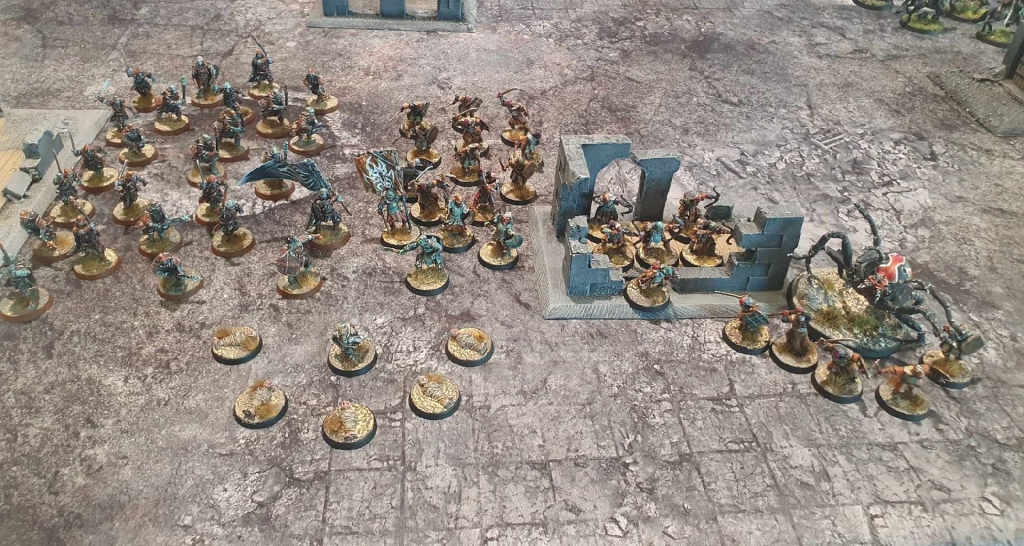
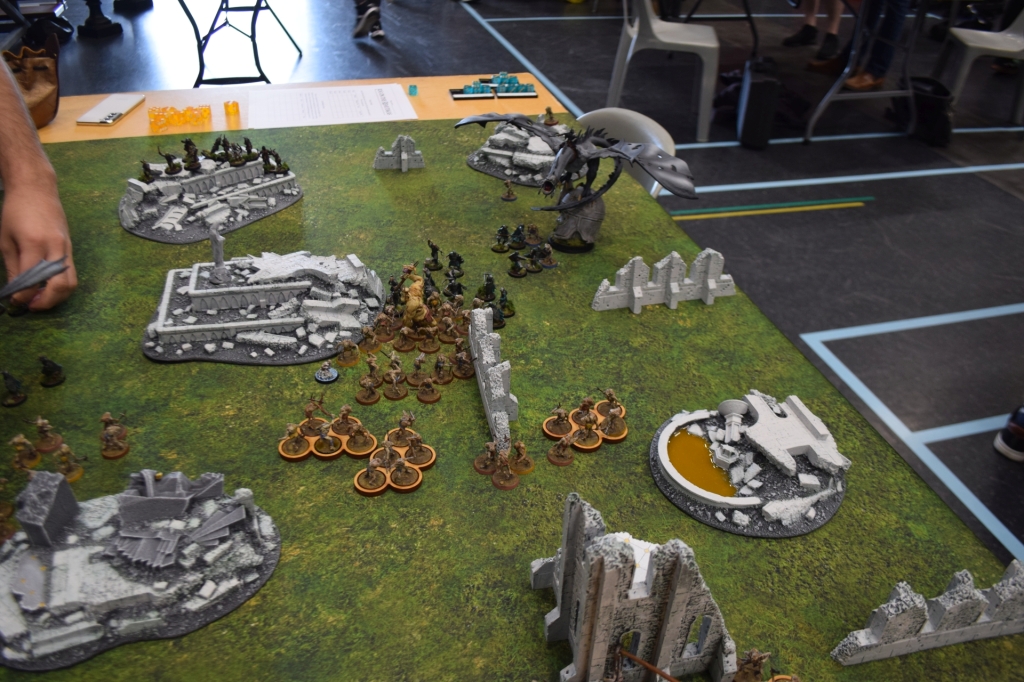
We’ve both been playing Angmar lately, so after a merry diversion in and amongst Minas Tirith, Goblin-town, and Moria (MT: and a very silly list we dubbed the “Romance of Aragorn” with Rivendell led by Arwen and Rangers with Aragorn I may return to this one day!). It was Angmar that we settled on. While the discussion on exact army composition was long and had many iterations what we finally settled on was smaller versions of lists we’d each run at events within the last six months with Minitrol’s headed up by Gulavhar and PhantomNuisance’s by the Witch King.

Big Critters, max terror, tricks, traps and lolz.

It was an uncomfortably small army with 31 models compared to last year’s 42 and we were distinctly worried about our lack of shooting given our experience of “gunline” armies the year before but not to worry the meta had once again pivoted!

Game 1: Fog of War vs. Erebor Reclaimed

Our first game saw us playing two of NZs best players, George and Denny… or it would have if Denny had actually made it to the event. Pro tip: when booking travel for events in New Zealand as we’re heading into winter, maybe think about arriving the night before.

George had managed a desperate rally around of alternate pieces from the Christchurch community which while not the list submitted was close enough – curve balls happen and it would wrong to penalise someone just because their partner could not physically make it, and with the tournament organiser standing in, we set to our first game.

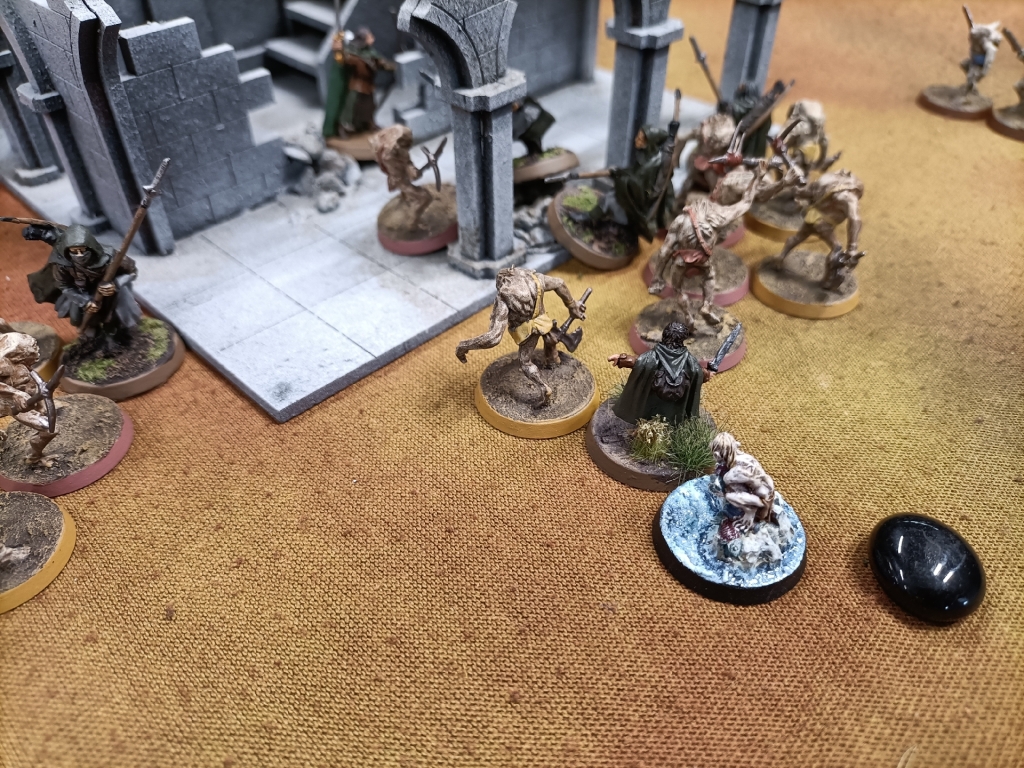
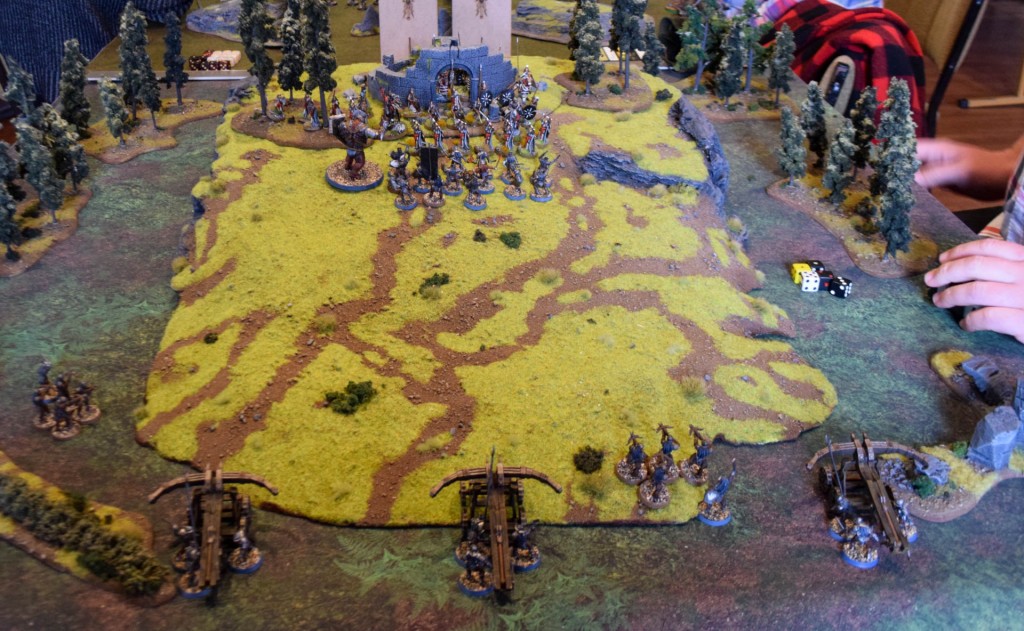
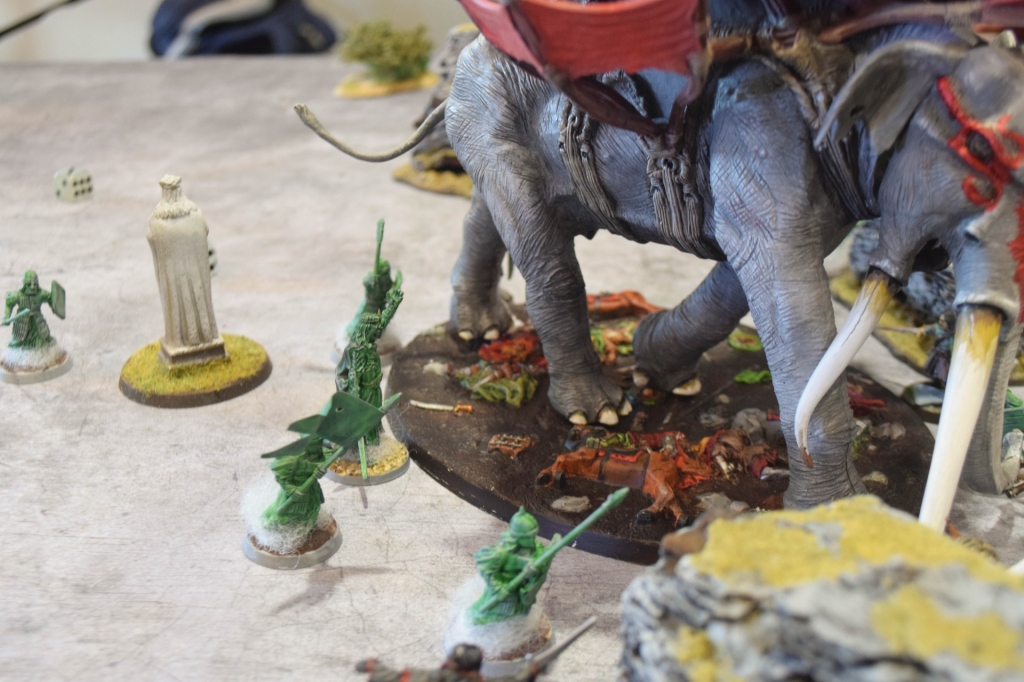
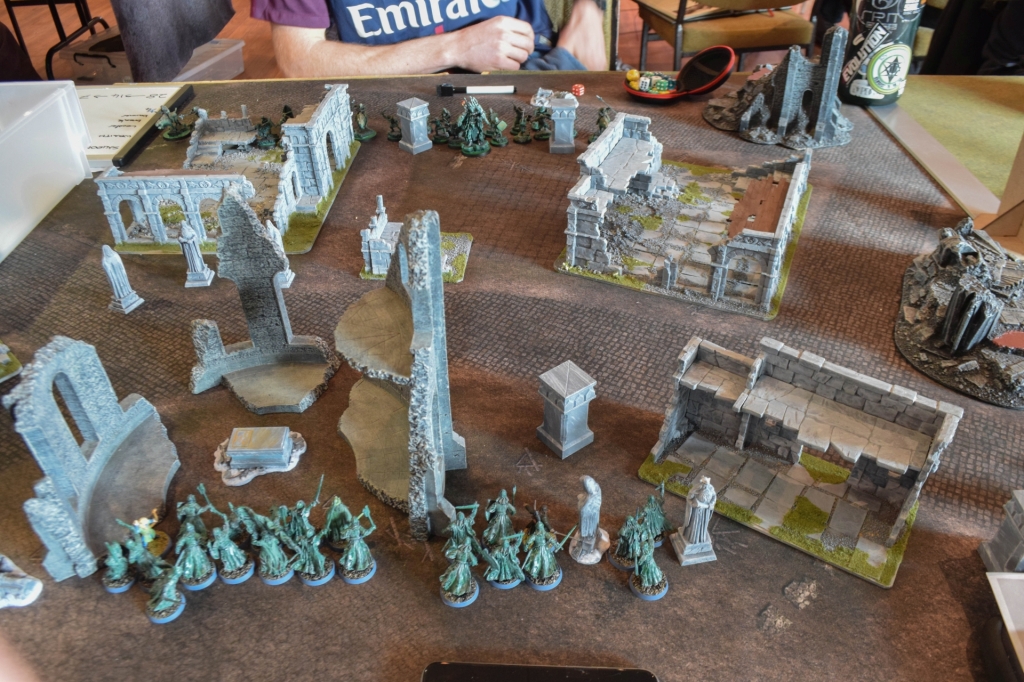
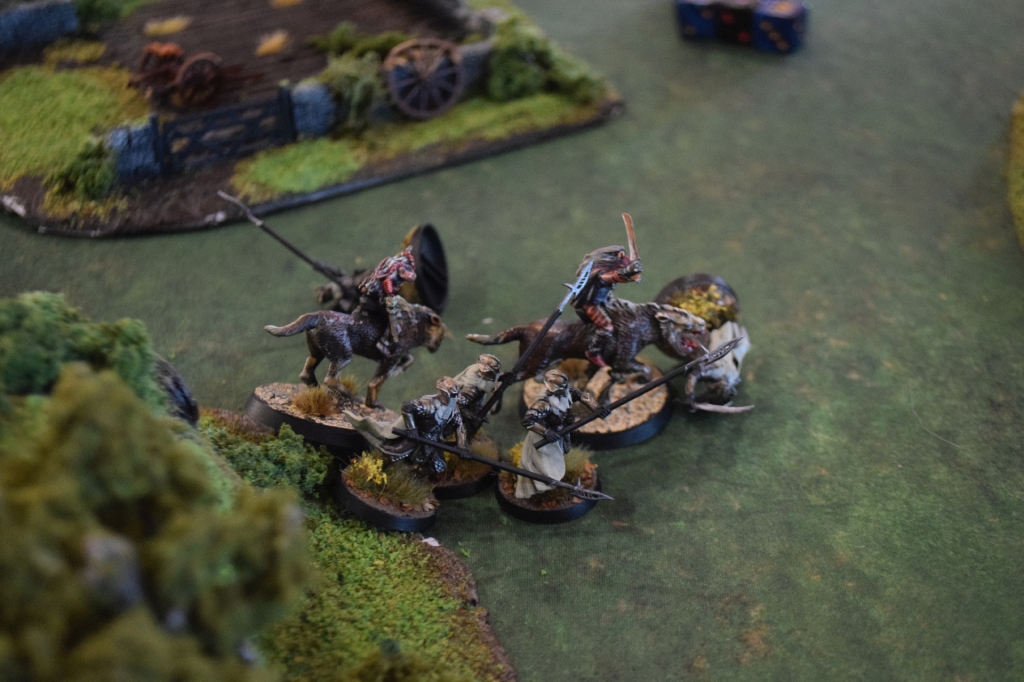
We opted to play a baiting game moving two forces on the flank and they did the same trying to bait Gulavhar into a combat which was identified as our best means of tearing apart the Dwarfen warriors. We had some great success staying in place forcing them to move around terrain. We used a spectre to draw Thorin out into the open, and killed his goat with a Black Dart. Thorin fell prone on the ground, but unfortunately it wasn’t a situation we could capitalise on without serious reprisal so we held back and waited for our moment to strike.

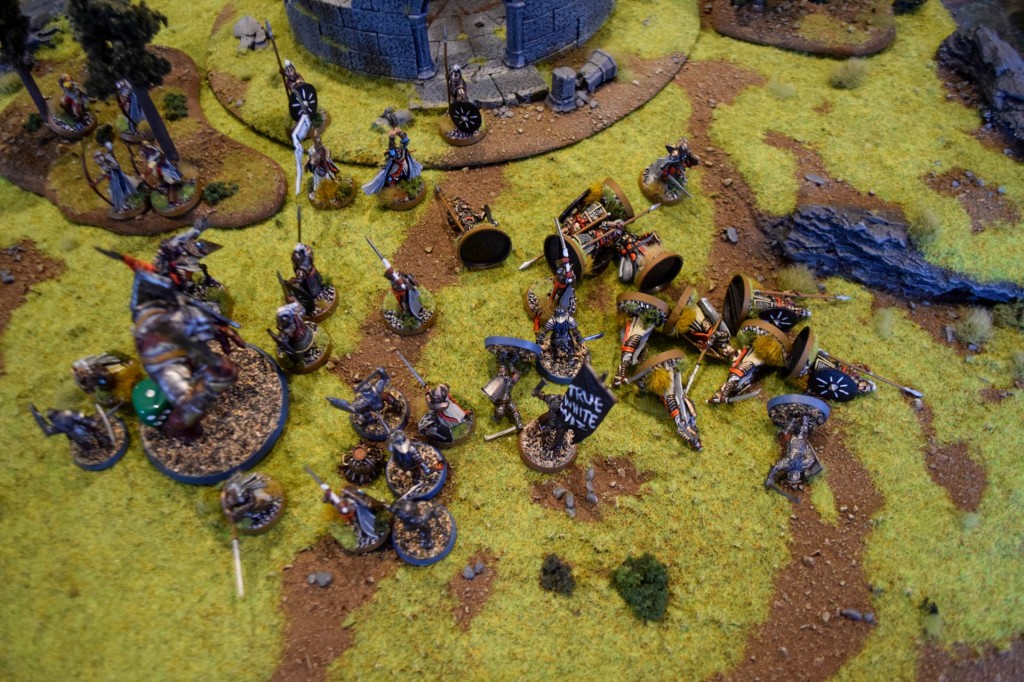
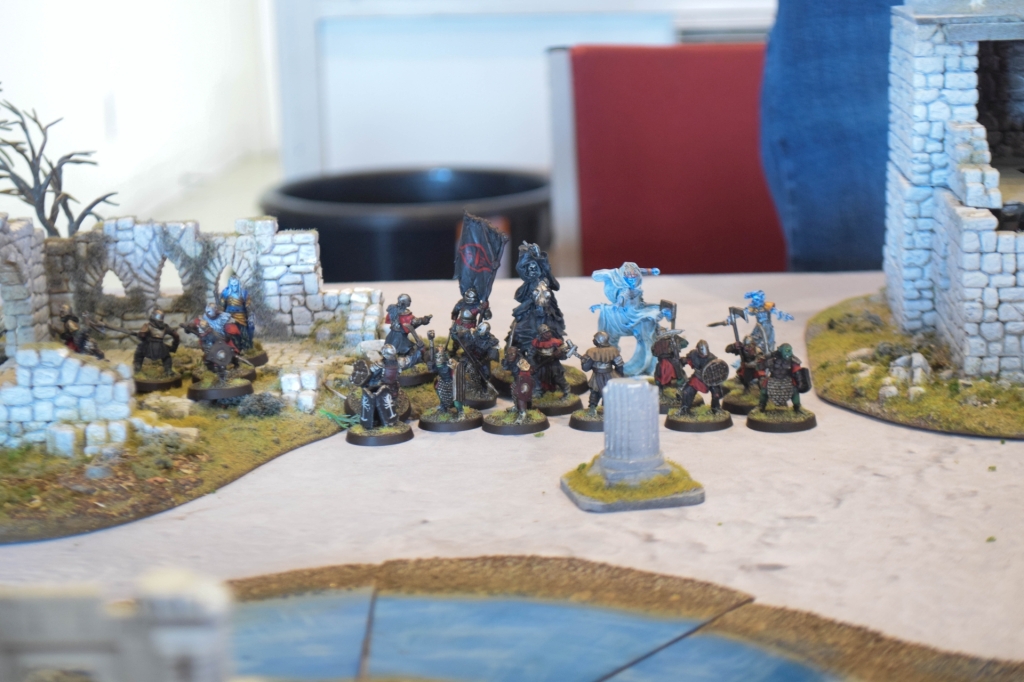
That moment was the following turn as our battlelines clashed. We activated the Shade’s ability (-1 to duel rolls for all non-Angmar models within 6″) and promptly lost all but one duel and about a quarter of our force.

This did not go as planned – there were twice as many orcs at the start of the turn.

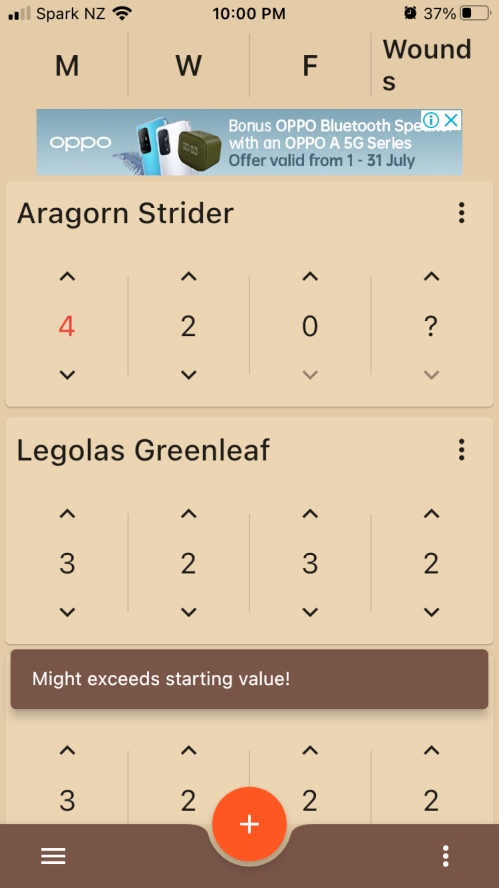
We managed to stall things for a couple of turns while we maneuvered the Witch King into position for a magical barrage and charge into Dain to try and deal with his fearless bubble. Needing a 3 or higher to cast Transfix PhantomNuisance managed to roll a 2 highest with two dice and a re-roll so used a Might to cast it. Dain resisted the spell but we continued with the charge, backing our Witch King’s three attacks in combination with the shade. It went as well as when our battlelines met earlier and the Witch King met his end.

Rohan banner bearer standing in for Dwarfs whose flight couldn’t land.

Meanwhile Gulavhar and a small number of Orcs on the right had been engaging in a game of cat and mouse with some Dwarf goat riders, with the orcs intent on capturing our intended terrain piece. Unfortunately the breaking of our army saw some of our orcs flee leaving our terrain piece contested by a dwarf, though we did use a spectre to ensure our opponent’s didn’t claim their terrain piece objective either. We played well, but the dice were definitely not in our favour for a couple of key turns and so we started our journey with a 0-9 loss.

Game 2: Total Conquest vs Minas Tirith

Fielding a similar army to one we considered bringing to the event the Forsey’s (a father and son team) arrayed the might of Boromir, Hurin, and an avenger bolt thrower against us.

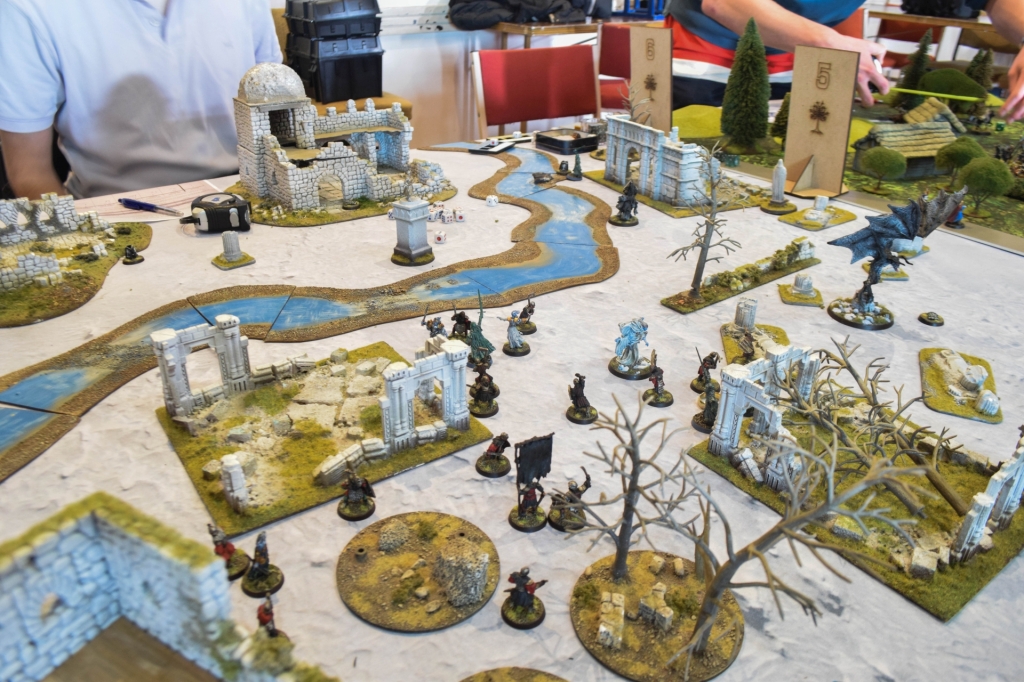
This was the first of our scenarios with a ‘hot zone’ deployment, where one force from each side deploys in the middle of the board with the potential to be engaged in combat from the first turn.

#HotZone

PN: When Minitrol and I were discussing Minas Tirith options with Avenger Bolt Throwers (yes, that’s plural), we quickly came to the conclusion that the range coupled with hot zone deployments would limit their effectiveness (as Good armies cannot shoot into combat) and we used both combats and range to our advantage in this game.

The Witch King force was deployed in the middle and, with the help of the shade, our force held its ground in the hot zone, won combats, and killed a bunch of Minas Tirith warriors. This was the army working as intended and was the opposite of our first game (it was nice to have the concept validated after such a poor showing in the previous game). Maelstrom deployment was good to us and Minitrol used his force to good effect stalling Boromir from getting to the hot zone by threatening with Gulavhar and the cave troll.

The hot zone stayed hot right to the end of the game.

We controlled both fronts well and as the game drew close to the end we moved models to claim or contest objectives, giving us a comfortable 9-2 win.

Playing the objectives to grab a solid win.

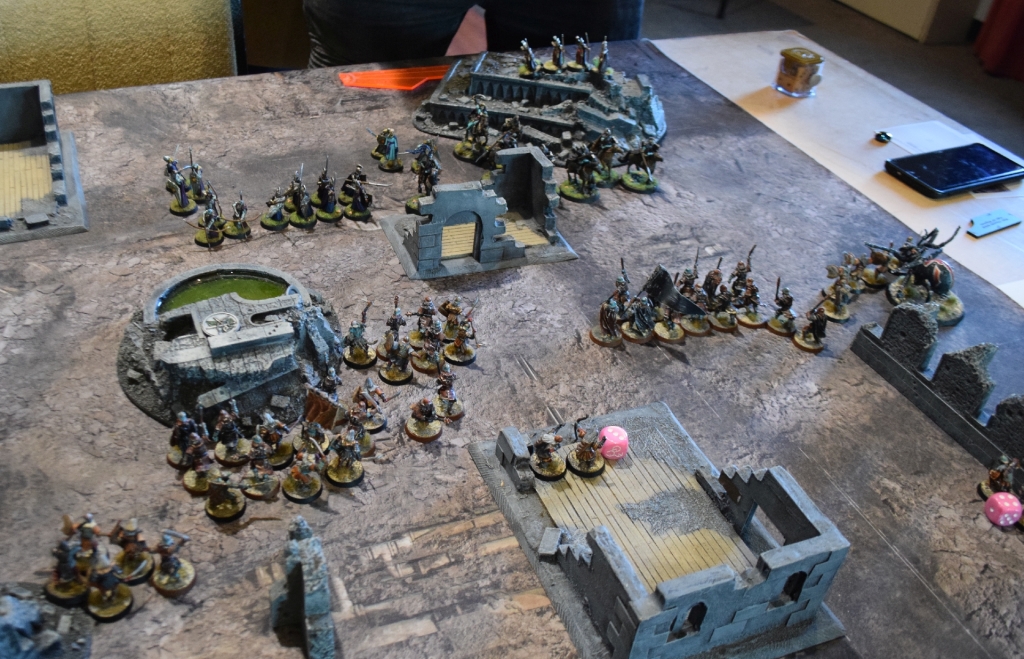
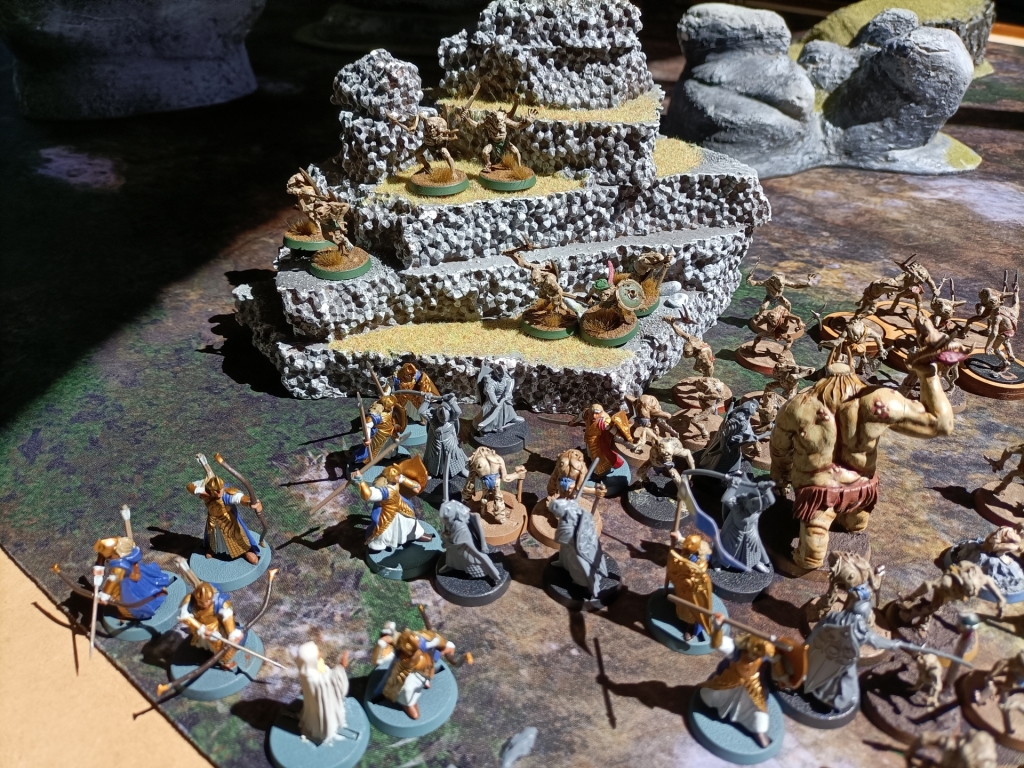
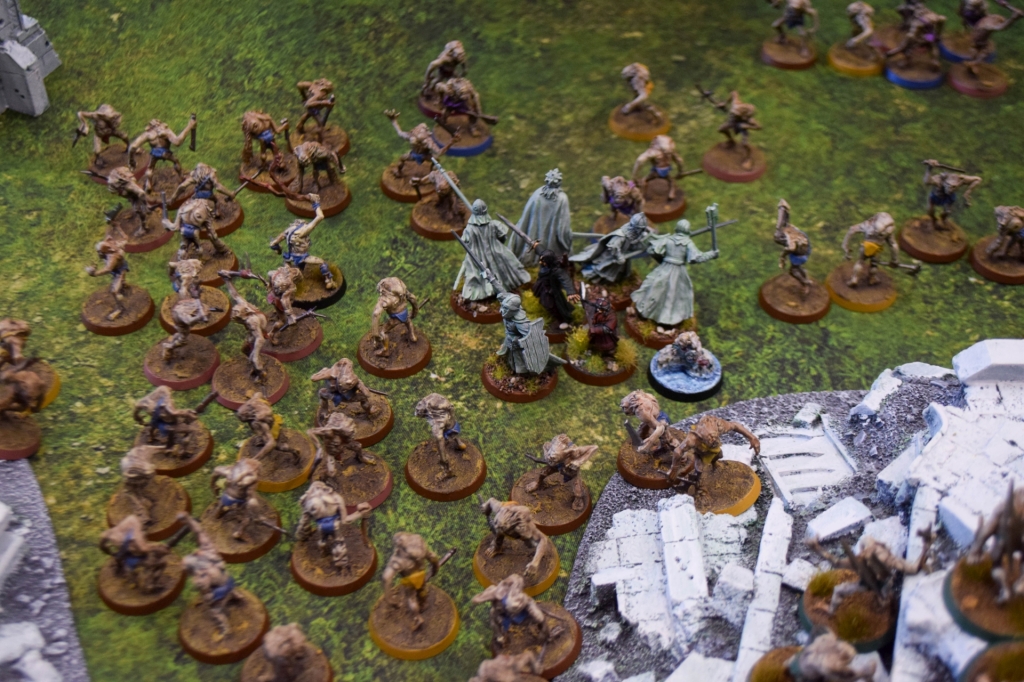
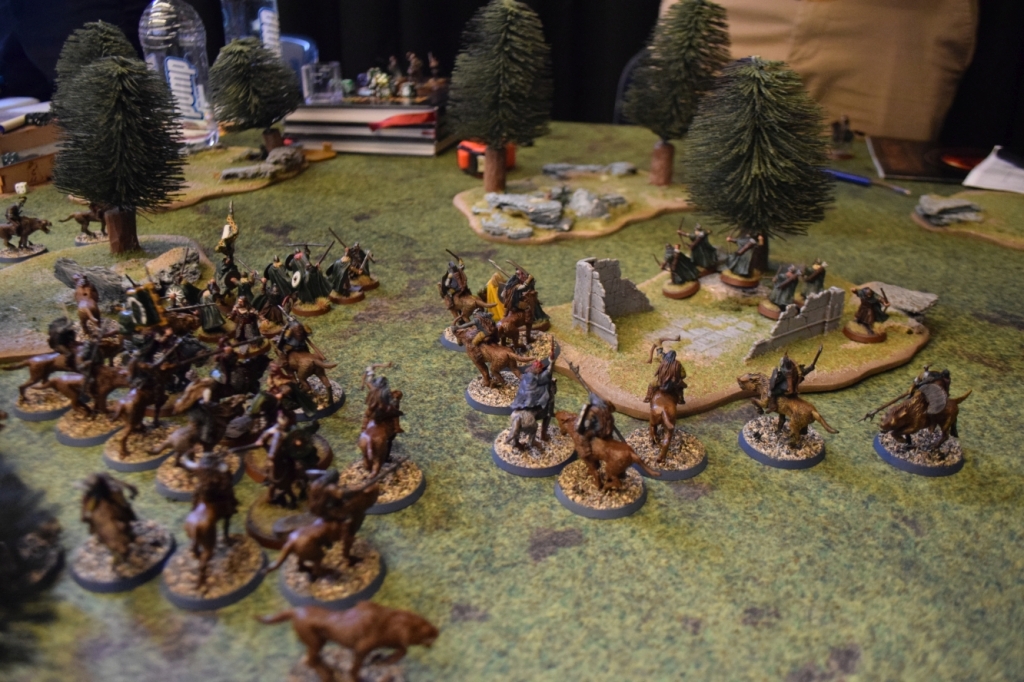
Game 3: Take and Hold vs. Halls of Thranduil and Rivendell

The event had a high proportion of Elves and a number of Elven Lords of the West and we were happy to have avoided these until this game (PN: we played elves all three games on day one last year). Arrayed against us were Thranduil, Glorfindel, and the multi-tool that is Cirdan. We had briefly discussed these match ups and had a plan going in, but we were going to have to work for it.

PN: My part of the game plan with the Witch King focused around the concept of ‘cheeky one dice Sap Will’ with the Witch King, a plan which went surprisingly well as I managed to get the required 5 or 6 each turn with the benefit of the re-roll from the Crown of Morgul.

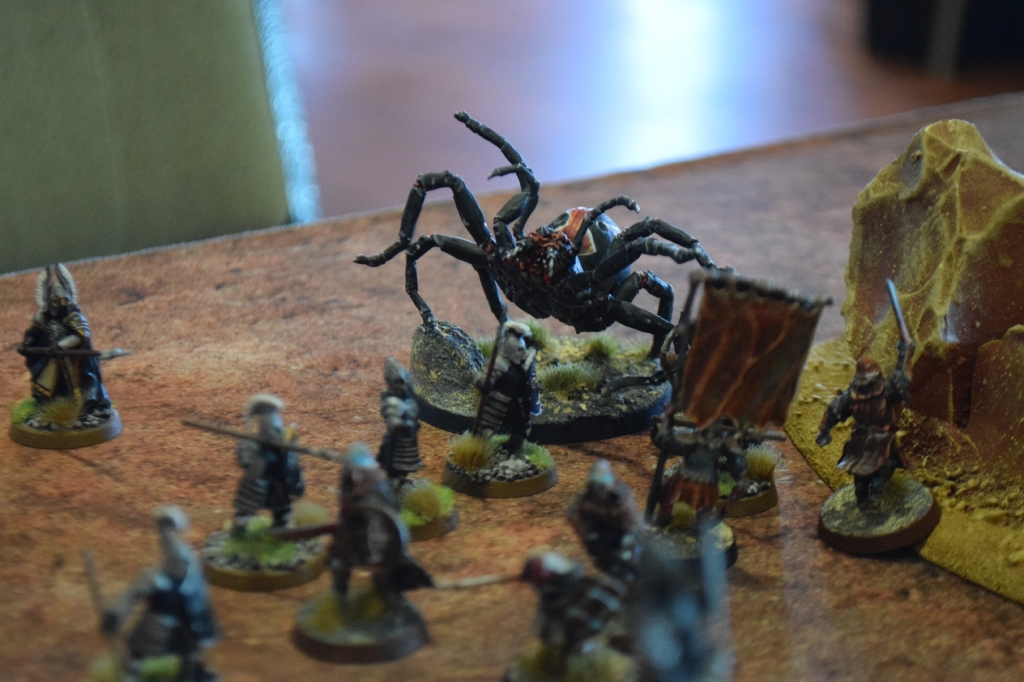
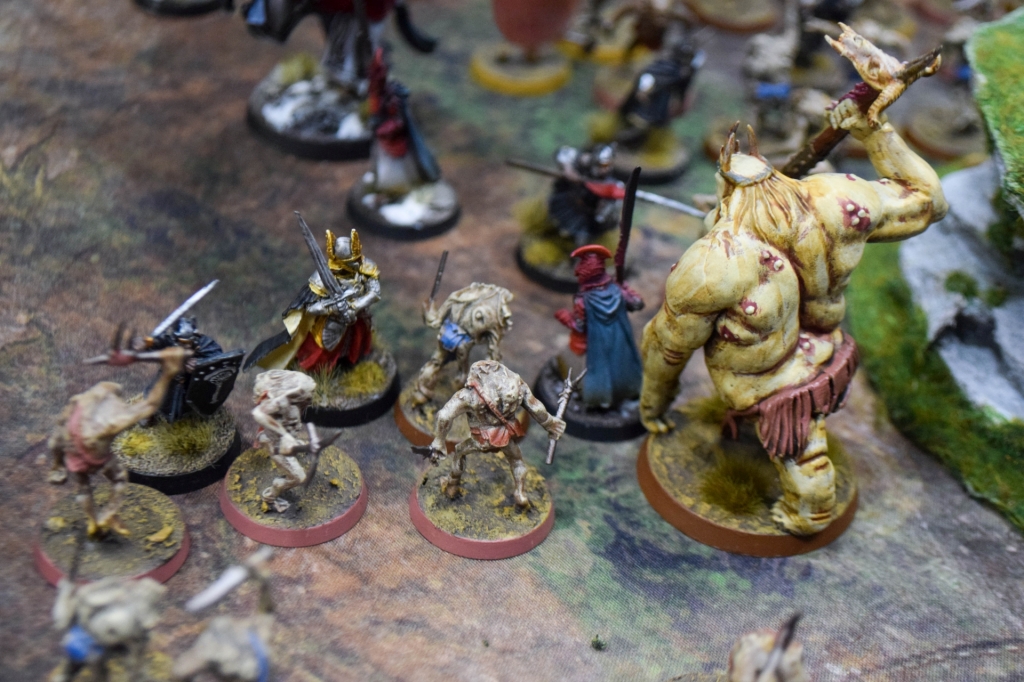
With the Witch King whittling down Thranduil’s will, Minitrol was kiting and threatening the Rivendell half with Gulavhar while his cave troll was throwing stones, including one which hit Cirdan and took his Fate from him.

The Battle of the Ornamental Bridge underway.

Meanwhile Gulavhar had been charged by Glorfindel but survived the elven lord’s onslaught. Minitrol called a heroic move to retreat, using Gulavhar’s fly move to avoid the scenery and get out of range of Glorfindel’s charge. From there he ate a few elves to replenish his wounds before a successful barge allowed him to get into combat with Cirdan and finish off the shipwright too.

PN: I sent my three warg riders around behind the Palace Guard, hoping to draw a few of them away and was pleased when seven of them were assigned to deal with the wargs. I was even more pleased when my warg riders killed four of them over the next few turns.

My warg riders punching way above their weight.

Despite our successes the elves were holding their own, and they managed to kill enough orcs to break us, leaving us in a precarious position as we scrambled to claim the objective (it turns out shades have courage 1). A transfix on Thranduil, and a couple of failed terror tests from our opponents meant that when the game ended we had controlled the situation enough that we outnumbered the elves for control of the objective, had managed to break them, and killed their leader giving us a 6-1 win.

The end game state which gave us our win. A very close, very deadly game.

At the end of day one things were looking pretty good for us: two wins and a loss. Apart from some poor dice in the first game things were going well. We were in sync; we were working well as a team and were successfully navigating the scenarios and armies against us.

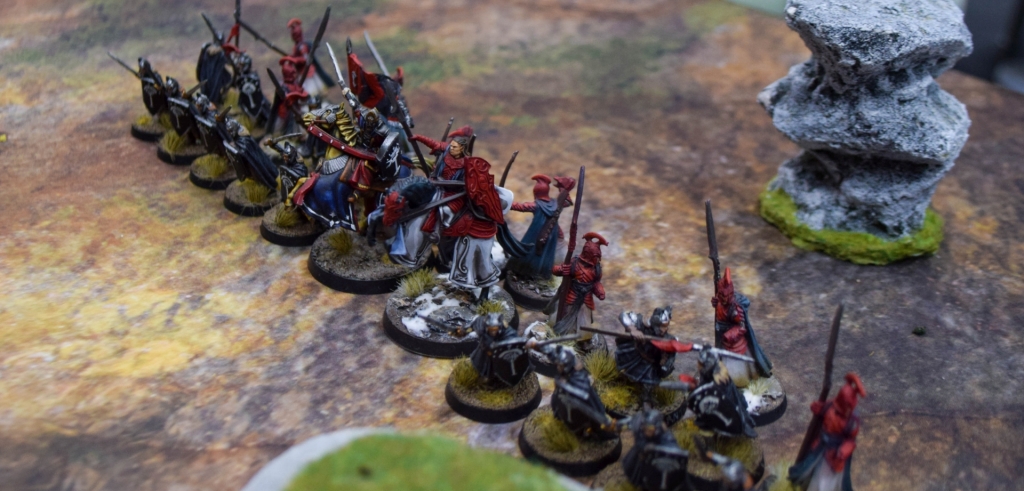
Game 4: Clash of Champions vs. Rivendell

Another Elven Lords list, this time with Gil-Galad, Glorfindel and Cirdan; tough, but we’d managed a win against a similar list yesterday and we were confident we could do it again. We were in sync, remember?

Back on the ornamental bridge table, back facing elves; welcome to day two.

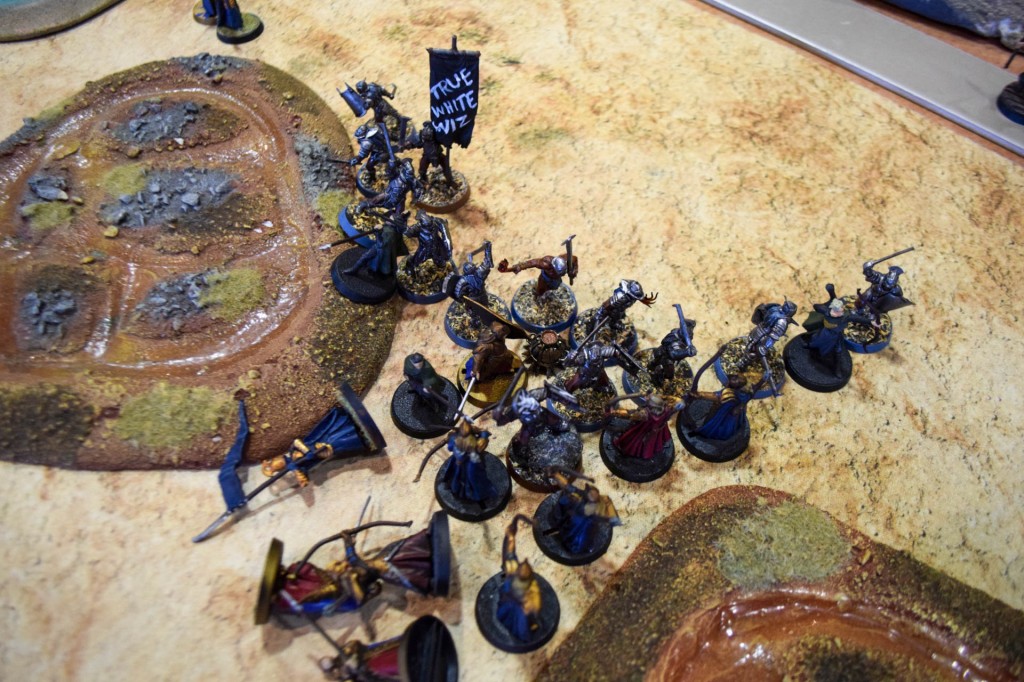
PN: Well, I don’t know what happened overnight, but we weren’t in sync anymore, and we started this game by messing up our deployment. It was going OK initially with my “cheeky one dice sap will” strategy kicking into gear and the troll dismounting Gil-Galad from his horse with a thrown stone, but by the end of turn three Minitrol and I realised we’d made that aforementioned deployment mistake.

To further emphasise how out of sync we’d become, instead of resolving our issue by some sensible regrouping, we went and made it worse and overextended ourselves. We spent the next few turns stuck in a reactive position, trying to control both Glorfindel and Gil-Galad while keeping Gulavhar safe.

Here you can see us both overextended, and overextended.

This meant that Cirdan was able to wander up to our lines with his Terror-causing area of effect and his auto-pass courage area of effect and put pressure on us.

Our two terror causing battlelines face off.

It was a bit of a long shot for us to pull it back together, and when both of our leaders died in the same turn it was the beginning of the end. James and Stu played well and capitalised on our mistakes, but in this case we were our own worst enemies and our 0-12 loss reflected that.

For professional paranormal investigations and eliminations, call Glorfindel. He’s ready to believe you!

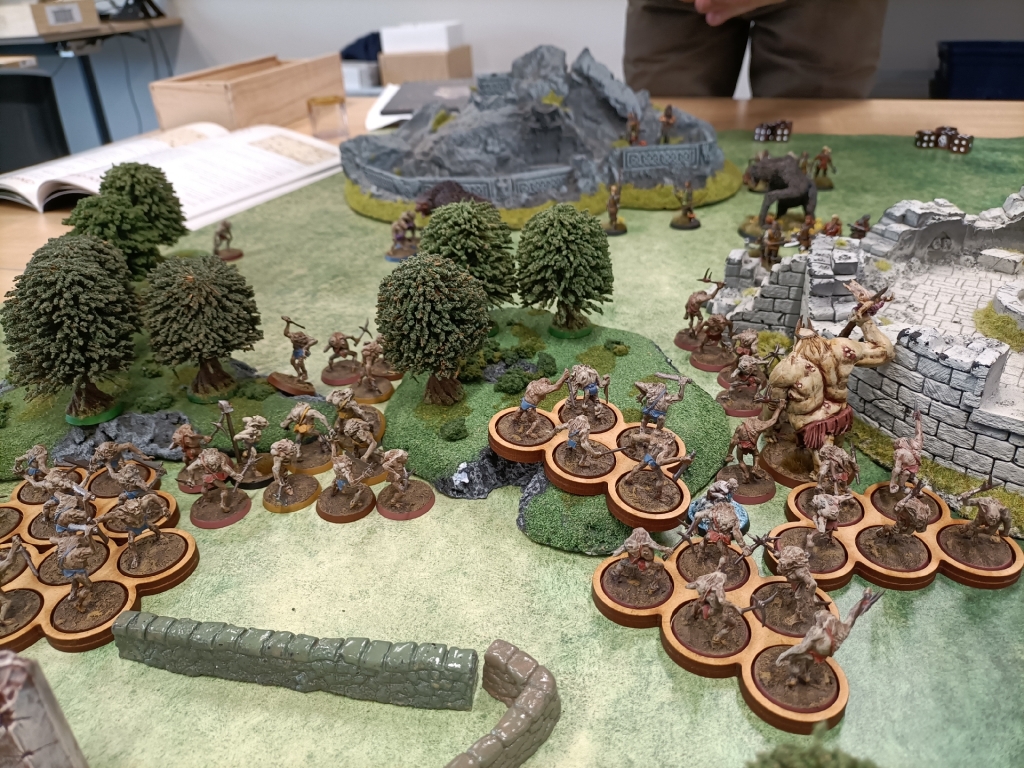
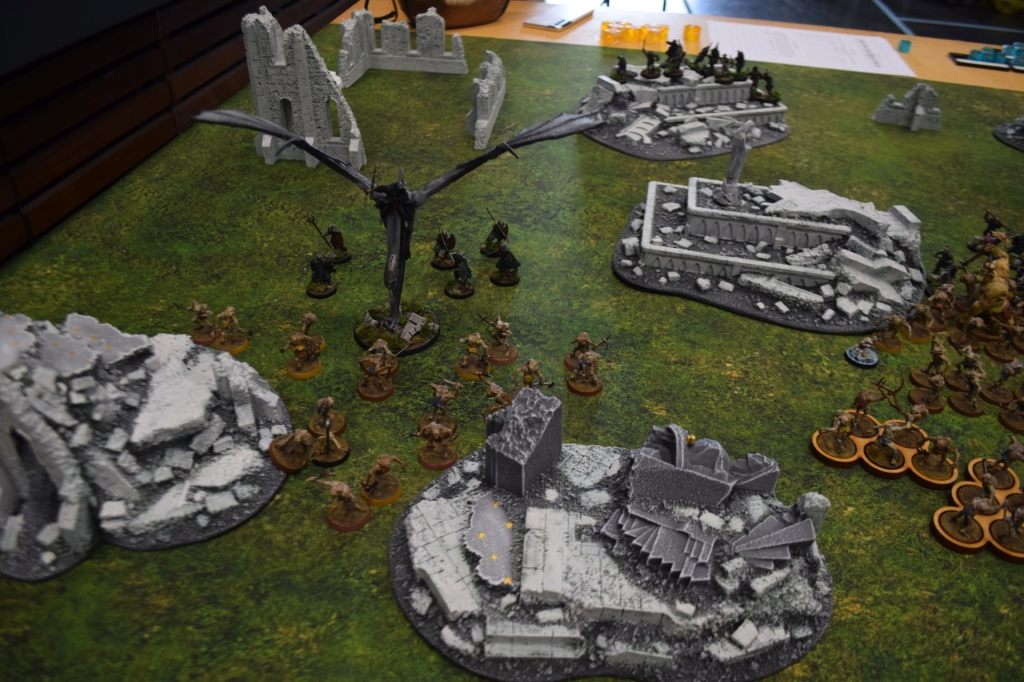
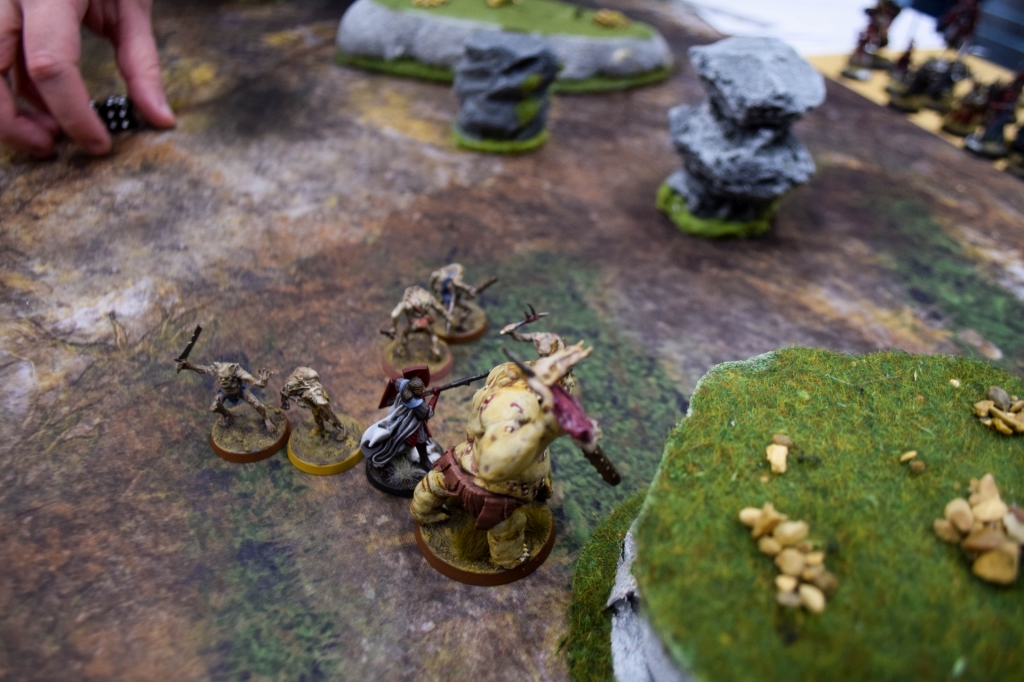
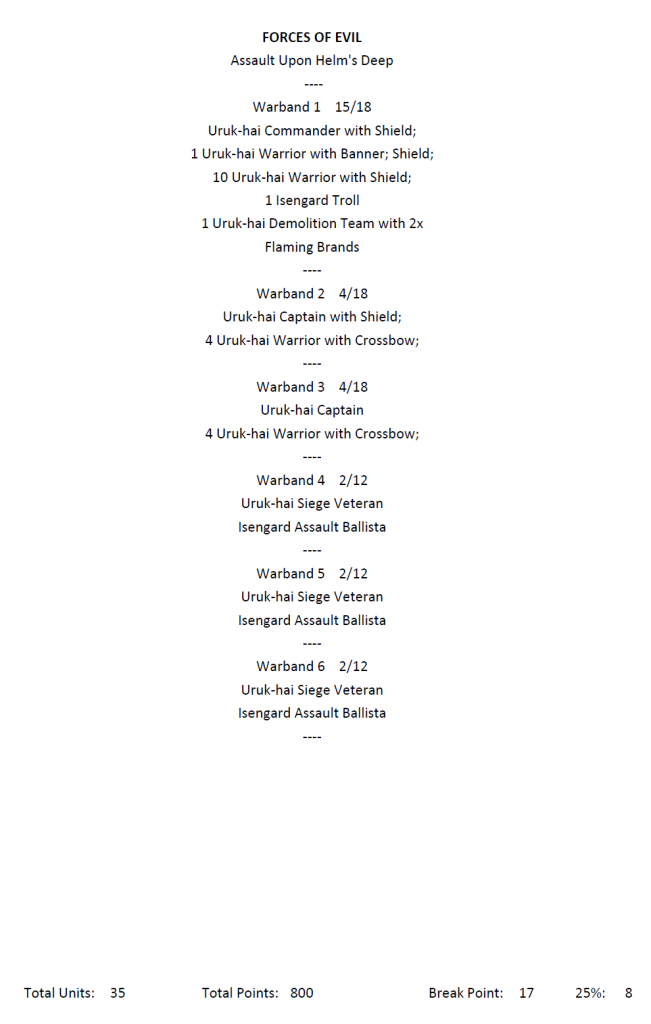
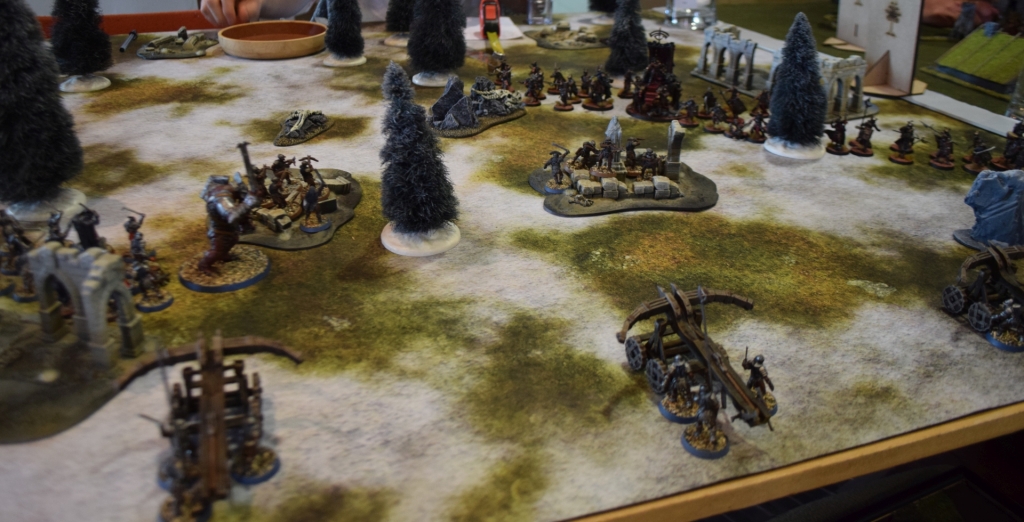
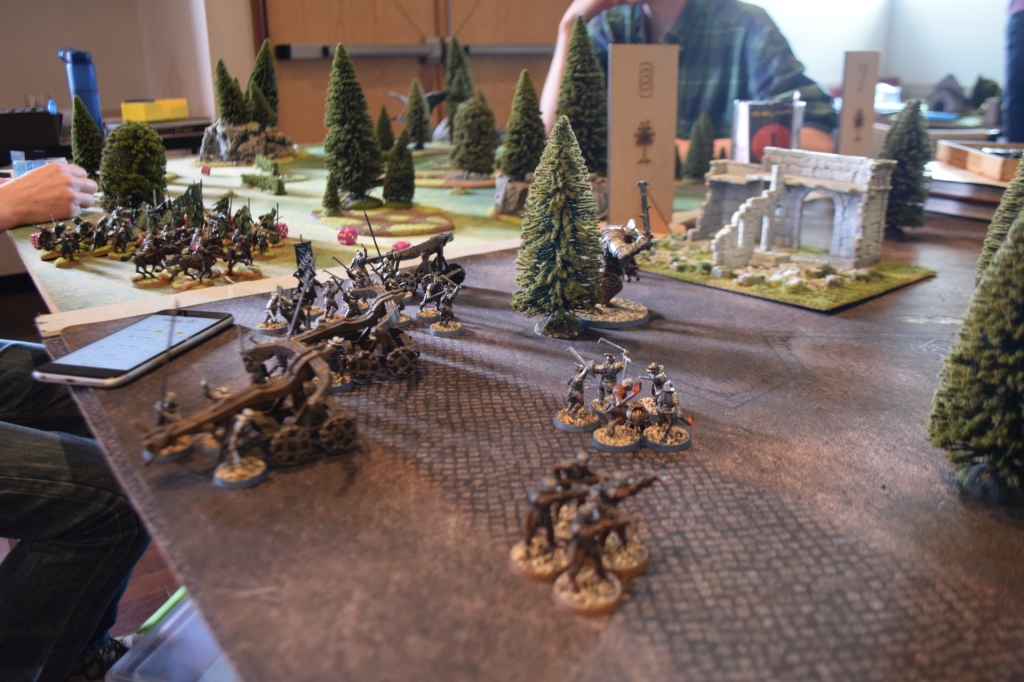
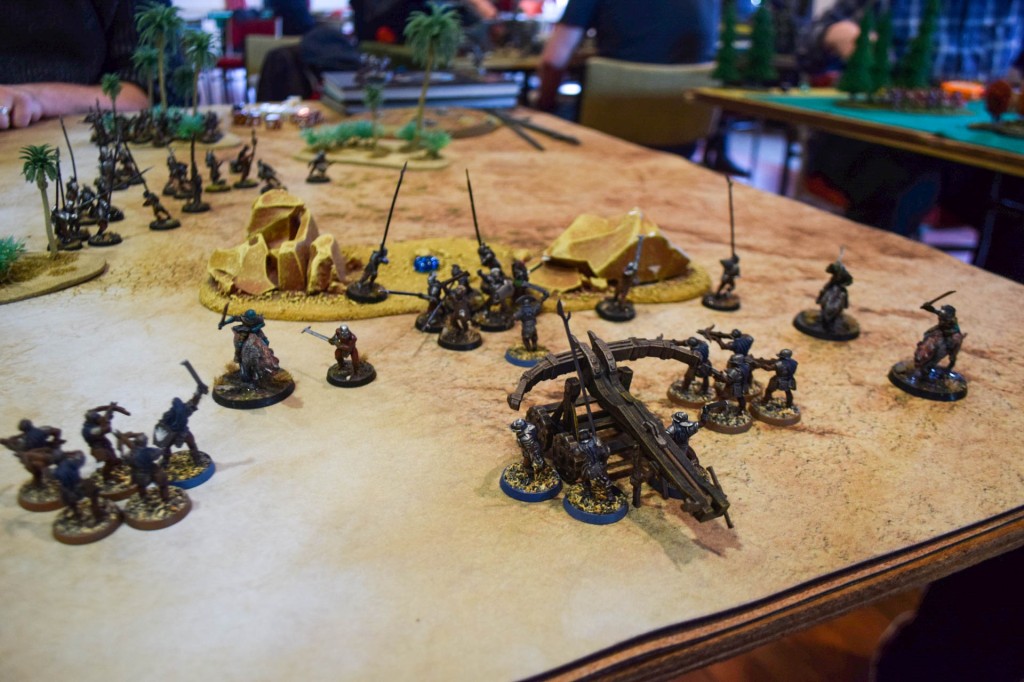
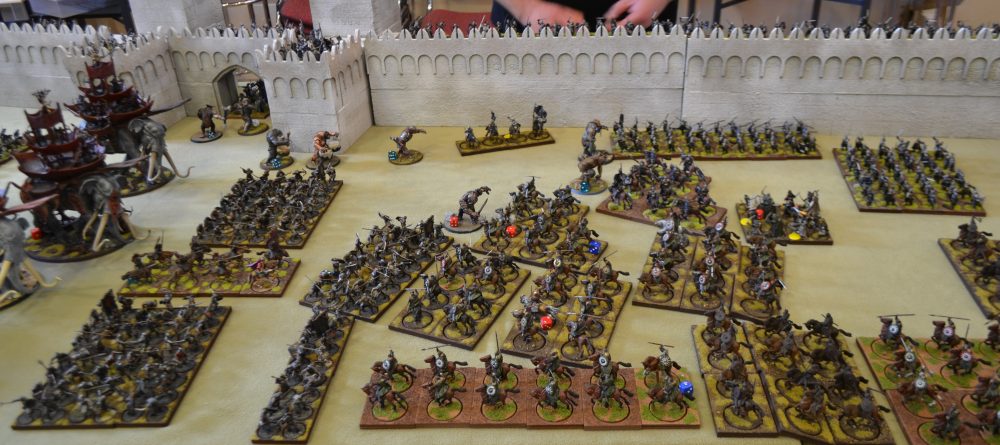
Game 5: Destroy the Supplies vs. Ugluk’s Scouts

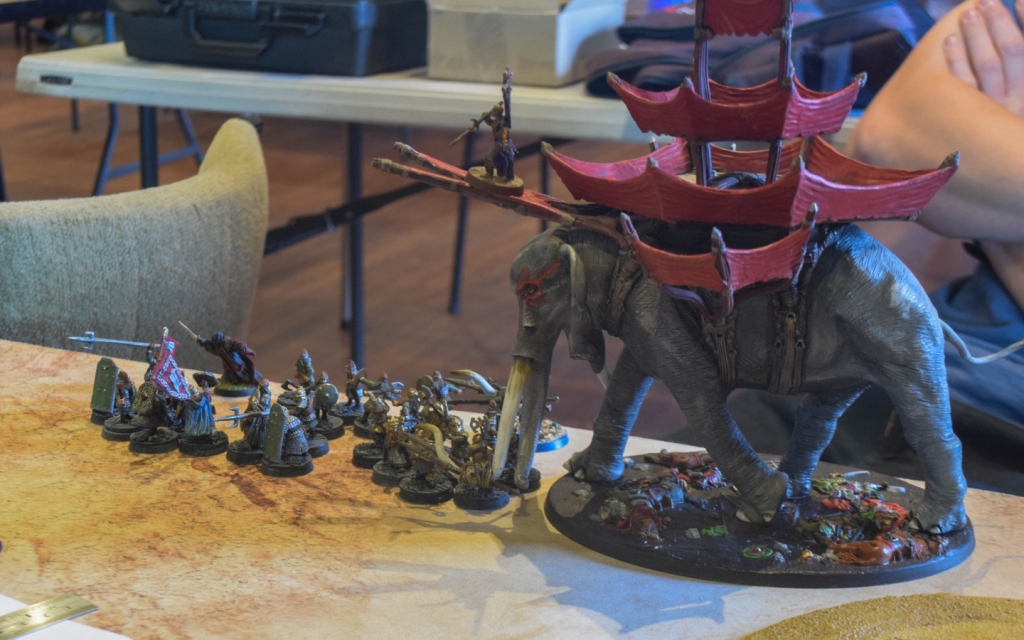
PN: Our final game saw us across the board from a 64 model Ugluk’s Scout list. I loved this list from a theme point of view, as it mirrored the list Minitrol and I took last year, including one person controlling all the Uruk-hai while the other controlled the Orcs. Great theme, huge mass of bodies. Love it!

Our quality vs their quantity… so, so much quantity.

With our force being almost outnumbered by double we would quickly lose a game where we tried to rush their supplies. We decided to play defence and only take an opportunity to destroy some supplies if it wouldn’t compromise our own. Gulavhar and our cavalry were our plans for this, but even then we knew it would be a long shot.

Our opponents surged forward with the majority of their forces, leaving only a small number of archers back to defend their supplies. They had also picked we weren’t going to be rushing them.

Gulavhar simultaneously baiting and being a deterrent.

Our first offensive started well with a cheeky spectre and black dart combo nearly killing one of their banner bearers (who promptly had an escort of at least three models for the rest of the game), however once our lines met things turned dramatically as our paralyse and transfixes failed to work and Gulavhar found himself taking a wound from Grishnak. We once again found ourselves out of sync and overextending, leading to Gulavhar getting locked in combat against the front of the enemy battleline for most of the game.

Monster mash! The troll’s spear served us surprisingly well across the event.

We held the line well, our terror helping to control the situation, and over the next few turns we drained most of the Might resources from their force, but their sheer weight of numbers was still keeping us contained. We managed to claw back a bit of control but by then a small number of their force had got around our flank and were threatening one of our supplies, and we didn’t have enough bodies to counter the move, resulting in them destroying one of our supplies.

Both battlelines thinned, but ours is the one feeling stretched.

We killed their Uruk-hai banner bearer but the barge and follow-up combat from our cave troll failed to kill the orc banner bearer. Gulavhar finally broke out of the main line of combat and jumped over the battleline, making a line to an enemy supply (through a bunch of enemies to regain some health), however the war of attrition had held long enough for the game to time out and our final game was a 2-4 loss.

And so another Side by Side comes to an end. It may have been a 2-3 win-loss, but it was five fun games with a good friend and if the brainstorming on the drive home is any indication, we’re both keen to return next year.

Posted in Games Workshop, Middle-Earth, Miniatures games

MESBG all-in-one FAQ updated

The latest Middle-earth SBG FAQs dropped on 16 February, and the “all-in-one” FAQ document is now updated.

Head on over to the Middle-earth Strategy Battle Game FAQs (Complete version) page to get it. If you’re still getting the previous version when you download the file, clear your cache

This all-in-one is a bit bigger than previous versions as the original files from the Warhammer Community site are larger this time (9-10MB each). I’ve managed to keep the all-in-one to under 12MB and, as with the previous editions, it also includes the last FAQ and errata for the Gandalf cover rule rook.

Happy gaming.

Posted in 2023, 52 Weeks Later, Age of Sigmar, Board games, Games Workshop, Middle-Earth, Miniatures games, Strategy games, Team games, Tournament, Wargames, Warhammer

52 weeks later: So what did happen in 2023?

So, it turns out I found my hobby limit in 2023 and something needed to give, and what gave was the website and blogging.

So, with all the not writing I did in 2023 what did I get up to?

I painted. A lot (well a lot for me). Painting is my least favourite part of the hobby, so I generally use upcoming events to drive myself to paint (flash fact; I’m currently writing this blog while I procrastinate painting the final models I need for an event this weekend). In 2023 I painted a total of 120 models, including two new armies, and also rebased an additional 130 Goblin-town models. All this was a far cry from the 26 models I painted in 2022 .

I played 64 individual games across 8 games/rulesets. 53 of those games were Middle-earth Strategy Battle Game (MSEBG) which were played across a range of singles, doubles, and scenario/narrative play.

I attended seven MESBG events, including a couple of local one-day events. It’s been great to see the local community grow over the last two years to the point where we have small one-day events and I look forward to those continuing. I also ran two events for the New Zealand Middle-earth League, including my long planned magic themed event which incorporated the Wizards’ Duel mini-game.

In 2023 I set myself a target to win 50% of my MESBG games and I most certainly didn’t lose more than 50% of my games.

Singles games that is, which is what I intended to set my 50% target for but didn’t actually articulate. While I’m not dismayed at the outcome I’m not happy either, so I’m going to aim for a 50% win rate again for 2024 (MESBG singles games), so lets see how I go on round two (I’ve already lost 5 out of 6 games this year, so I’ve got some climbing to do).

I did have some awesome games throughout the year though, and while I didn’t blog as much as I have in previous years I did always take notes and pictures. As such I’d like to wrap up this blog with a few of my favourite games from 2023.

Goblin-town vs Jeremy’s Rangers of Ithilien

After deployment my Gollum was on the opposite side of the board from his Smeagol and the Hobbits. With a chuckle in his voice Jeremy said it would be pretty funny if Gollum made his way over to the hobbits to get the ring back.

As my Gollum didn’t have the One Ring (Frodo being on the board in Jeremy’s army) there really wasn’t a lot he could contribute to the main combat that a billionty goblins weren’t already, so I started Gollum on his epic quest.

Avoiding the swirling melees across the width of the board, Gollum made his way across the board to the building where Frodo, Sam, and Smeagol were. The nearby Goblin swarms distracted the rangers (killing them counts as distracting, right?) allowing Gollum to get into combat with Sam, who he bested and killed.

The following turn, in one of the most cinematic moments of my MESBG gaming history, Gollum called a heroic combat killed Smeagol and then moved into combat with Frodo, getting the killing blow and claiming the Precious! (I also won the game, but at that point that was a secondary consideration).

Goblin-town vs Paddy’s Beornings

My second game that same day was against a Beornings Legendary Legion, where my 69 goblins went up against a handful of Beorning warriors and the two skin changers (i.e. Bears).

In a game of Fog of War where I was broken relatively quickly (bears fight good) I managed to stay in the game long enough to wear down the bears, win some key combats, pass some key courage tests and pull out an unlikely win.

Here’s slideshow showing the progression of the Battle for the Hill. In the final picture you’ll note a goblin warrior just poking out above Grimbeorn’s head… that’s the goblin of the match having beaten Grimbeorn in combat, driving him back and, more importantly, not having to back off the terrain piece Paddy was attempting to claim.

Always a pleasure to have a game with Paddy, who always has beautifully painted armies to boot.

Dune

Minitrol had been keen to get us playing Dune for a while, and one night the stars aligned. I took the role of Harkonnen, as befits my generally aggressive/horde style of gameplay. Following the game provided notes that I was at a better position in the early game than others I launched an aggressive and expansionist push quite early to try and get a quick win.

When that stalled I promptly started playing devil’s advocate and sowing some discord at the table, while currying a bit of good favour with Allonaire who was playing Atreides. When the opportunity came up for an alliance, Alllionare took it and from there it was a matter of getting ourselves into a winning position to consolidate our power.

I consider myself lucky Allonaire didn’t get the opportunity to break the alliance, as he was certainly in the better position of the two of us and could probably have backed himself to ditch me and get the solo win.

“Floorhammer”

A team from Dunedin travelled to Wellington to attend the annual Battle of Five Regions event for the NZ Middle-earth League. While the event itself was a great amount of fun, the most memorable game of the trip was on the night we arrived in Wellington. Due to some glue failure and #LifeStuff which came up during the week Minitrol had submitted a new army for the event just days prior and wanted to give it a test run. We set about raiding the motel unit for items to use as terrain and played a game of “Floorhammer”.

Minitrol won the game, but it was great for the laughs, casual vibe, and the fond memories of 2nd edition Warhammer 40,000 games on my lounge floor from our teenage years.

The Battle for New Years Eve

And it wouldn’t be a year at 52Weeks52Games without the traditional Battle of New Year’s Eve, which this year saw Minitrol, Allonaire, and I battling it out in a three player Triumph and Treachery game of Age of Sigmar.

For the first time since January I got the Slaaneshi Salesgirls out of storage and faced them against Allonaire’s Lumineth Realmlords and Minitrol’s Flesh Eater Courts. With a mix of rules ranging all the way back to first edition Age of Sigmar Realmgate rules (circa 2015) we happily rolled dice and caught up. I think gaming was the winner on the day… or friendship… or Minitrol. They’re certainly not mutually exclusive winners.

Posted in Games Workshop, Middle-Earth, Miniatures games, Strategy games, Tournament, Wargames

Side by Side with a Friend 2023 tournament report

Side by Side With a Friend is a 700 point doubles tournament (350 points per player) which has been a staple of the New Zealand Middle-earth League (NZMEL) calendar for a few years now.

Minitrol and I have talked about attending Side by Side for a couple of years but the fates never aligned until this year. Minitrol had recently obtained a Shelob model and I pitched the idea of a Cirith Ungol legendary legion force.

Minitrol was sold on the theme and had two stipulations. One – he got to paint both forces; two – well, I can remember that there was a second clause but to be honest he had me at ‘you don’t need to paint anything’.

Having decided on the theme we set about army crafting and realised we needed more than the dozen Mordor Uruk-hai I owned. Fortunately I was able enough to source another 15 without too much trouble and after a bit of converting had a banner bearer and some captains before passing on the masses to Minitrol for painting.

Apparently it doesn’t have a larger effective range, so I brought it down to size after this.

The Cirith Ungol legendary legion rules give Orcs and Uruks a +1 to wound bonus if they’re in the same fight as a model from the other race. While it would have made best game sense to have at least one warband of Orcs and Uruks each, our army composition was determined 100% by theme. Minitrol would command Gorbag, the Orcs and Shelob and I would command Shagrat and the Uruks. Some may look at the army and think we went a little overboard on two-handed maces for the Uruks, but those people have clearly not been tempted by the sweet siren song of +2 to wound.

Minitrol also painted up five webbed Frodos and a Sam for us to use as obective markers to round out our themed army.

Game 1: Fog of War

Arrayed against us for game one was a Rivendell force with Elrond, Glorfindel and Cirdan piloted by a father and son team. Knowing from memory that Cirdan would be hiding behind a block of Elf infantry we chose Elrond as our ‘to kill’ target, as we knew he would at least be in combat and we would have a chance to wound him.

The game started sub-optimally for the Rivendell force with Cirdan failing his channelled Aura of Dismay with 4 dice. Having failed this initial attempt it took him a few more turns with his free will before he finally managed to get it up and running. We called a double Heroic March and tried to close the ground as soon as possible.

When our lines finally met our Orc and Uruks started making hard fought inroads into the enemy shield wall while Shelob went deep into the back lines to harass some archers on an outcrop.

Elrond and Shagrat ended up in a protracted series of combats however neither of them managed to wound the other on they turns they won, leaving our troops to do the steady work of killing and breaking the Rivendell force. Sensing the impending end of the game our opponents sent a lone Elf racing to claim their target terrain piece; a wise move as the game ended that turn before we could contest it. A close game which was reflected in the score, a 6-7 Minor Loss.

Game 2: Total Conquest

Our opponents in game two were another father and son team and were running a Defenders of Helm’s Deep legendary legion. Their list had Theoden, Gamling, Haldir, Legolas and Gimli as their heroes, with the warriors being a nice mix of Rohan and Lothlorien Elves.

There was a river running through the middle of the board so the game started with a grand ‘throw down in a puddle’. Theoden burned an early two Might to cause some damage but with Gamling and the Royal Standard in proximity it was Might which could be recovered later if needed.

We thought we were being clever by making Legolas’ warband enter the board in the river but the elves with him adapted well and spent the majority of the game in the river shooting at whatever Orcs and Uruks left themselves within line of sight and range.

When given the opportunity to cause wounds Shagrat consistently killed warriors but wasn’t able to put wounds on any heroes. The result of this was that the Rohan forces in the middle of the board had been slowly whittling down the Uruks while Theoden and Gamling stalled out Shagrat and we counted ourselves fortunate that our Orc reinforcements finally arrived at the middle of the board with a banner just in time to replace the Uruk banner which died.

Shelob made a minimal impact on the flank and our casualties continued to mount up. As the game came to a close we made some dashes to objectives and claimed a 4-4 Draw.

Game 3: Take and Hold

Fate had decided we hadn’t faced enough (filthy) Elves for the day and game three saw us facing both Rivendell and Lothlorien elves. Despite the board being populated with the most cover of any of our day one games we were losing a couple of warriors per turn to archery in the first turns of the game.

We called some heroic moves to close the distance, and even managed to pull off a clever manoeuvre which allowed us to get behind and encircle a group of the Lothlorien elves.

Shelob made a massive impact this game by killing Elrond, therefore removing a significant threat from the Rivendell half of the force. The Uruks were making slow but solid progress killing the Lothlorian elves but weren’t fast enough to come to the aid of the orcs whose fights weren’t going in our favour.

Both of our forces broke in the same turn abruptly turning the slog into a desperate scrap to control the objective in the centre of the board before the game ended. At this point we were able to capitalise on our (slightly) superior numbers and our remaining heroes keeping our warriors in the game with their stand fast. The game continued for enough turns that we tabled the elves and finished day one with a 10-1 Major Win.

Game 4: Clash of Champions

When the primary victory points for a scenario are determined by comparing your leaders kills against your opponent’s leaders the last thing you want to have opposing you is Aragorn, King Elessar, but that’s what we ended up facing. Along with a cadre of warriors there was also an Avenger Bolt Thrower. The other half of the force was Rohan containing Dernhelm, Gamling with the Royal Standard and Haleth (remember kids: when proxying make sure you point out your proxy models to your opponent at the start of the game).

We deployed as close to the enemy as we could with our Orcs and Uruks intermingled to capitalise on our legendary legion bonus, and planned to surge forward as fast as possible. Our opponents deployed back to give their bolt thrower a good couple of turns to make an impact.

The first turn saw the Avenger Bolt Thrower claim a fate point from Shagrat, and in return our Orc archers claimed a fate point off Aragorn who used his Horse Lord rule to save his horse.

And that was pretty much our high point.

Shagrat went down to the bolt thrower the following turn and our opponents more plentiful Might resource allowed them to control the momentum of the battle and capitalise with key kills and heroic combats. In response we were struggling to wound when we won combats even with the combo of our legion bonus and two-handed weapons giving us a +2 bonus to wound in multiple instances.

Shelob did manage to get behind our opponents lines and take out a few warriors and neutralise the bolt thrower, but wasn’t able to make much more impact than that.

After breaking we lost the crucial roll off for heroic moves and with our heroes engaged in combat we watched as a number of our warriors fled to failed courage tests. It wasn’t long until we were reduced to 25% and the game ended with a 0-12 Major Loss.

Game 5: Destroy the Supplies

Of all the scenarios at the event we felt pretty confident with this one. We had a good number of models to allow us to be as aggressive or defensive as needed, and Shelob could be utilised as a quick and agile piece to threaten enemy objectives.

Unfortunately we came up against a shooting heavy Serpent Horde list with 23 poisoned bows, and a table with a lot more open ground than we would have preferred for such a match up.

We again deployed as far forward as we could, and again our opponents deployed back to play to their (poisoned arrow) strengths.

In the first turn we lost 14 models to shooting. I’ll save you the effort of scrolling back up to our list; that’s a quarter of our army.

We tried a cheeky jink with the units on our right, going around the marsh rather than continue into the danger zone, but it didn’t split our opponent’s focus enough to make a difference. They committed just enough models to acknowledge that a threat existed and continued to pummel us with shooting.

When Shagrat took a wound I let it be without attempting to make a fate roll, and that was really the signal that game was over as that decision conceding a victory point to our opponents. The famous PhantomNuisance last round fatigue strikes again.

When our lines finally met we had lost so many models that we found ourselves using what scenery we could to prevent ourselves from being surrounded and trapped. We again felt the sting of the dice when Shelob failed to win consecutive combats, and we couldn’t consistently covert the combats we did win into wounds and it wasn’t long before we were broken.

There are times in MESBG where you know you’ve lost but you still have a degree of control over how bad that loss is, and this was one of those games. We shifted our strategy to ending the game (getting to under 25% of our starting models alive) before our opponents got to our objectives, strategically taking courage tests for our warriors before our heroes in an attempt to have as many as possible flee.

In an ironic twist we won a greater proportion of fights that turn which kept our causalities lower than we would have liked and the game continued. We measured the distance from our opponents models to our objectives and knew we had one turn to end the game before they could start to destroy our supplies and rack up more points. In a grand display of fleeing and dying we got below 25% and the game ended with a 0-5 Major Loss.

And so we closed out the event with a 1-3-1 record and were one of two teams to get favourite army votes (and based on the absolute landslide victory of the favourite army, it was nice to be acknowledge by the winners).

Bonus game: The Tower of Cirith Ungol

Minitrol was in charge of packing and transporting the miniatures for the event, by virtue of they were all at his house being painted. The week after the event I went around to collect my (beautifully painted) Uruk-hai and it seemed a shame not to have a game while I was there.

I dug out the Tower of Cirith Ungol scenario from the Return of the King sourcebook (not having the required scenery to do justice to the Quest of the Ringbearer version), and Minitrol and I set to determining the dominant force in Cirith Ungol.

In this version of the scenario the Uruk player controls Frodo and Sam and has to escape them off the eastern board edge. Frodo and half the Uruks start on the western side, and Sam and the other half start on the eastern with the Orcs in the middle. The Orcs are trying to kill Shagrat and escape with the Mithril Coat off the eastern board edge or kill both Hobbits. As per our doubles games Minitrol was controlling Gorbag and the Orcs, and I was controlling Shagrat and the Uruk-hai (and the Hobbits).

The game started poorly for me with Minitrol tying up my Uruks and quickly engaging Frodo in a fight. A couple of lost priorities and some poor rolling from me saw Frodo dead the turn after, leaving me in a position where I could only draw or lose.

Shagrat decided to buck up his ideas after that and the Phial of Galadriel and a defensible wall kept Sam safe long enough for the Uruks to round up and finish off the orcs. Shagrat finally got into combat with Gorbag, cutting down the Orc leader. With Sam, Shagrat, two Uruks, and two Orcs left on the board Minitrol took a couple of final shots at Sam (which both failed) and we called it a draw. A great way to wrap up our Side by Side experience.

Posted in Games Workshop, Middle-Earth, Miniatures games, Strategy games, Tournament, Wargames

Fog on the Remutakas tournament report

How is it March already?!?

It seems like only yesterday Minitrol and I were talking about scheduling his Battle for New Years Eve Eve post which I was going to follow up with a 2022 debrief. It turns out a whole lot of life has happened, including a tournament in February, so you’re getting the salient points of the 2022 debrief rolled into this one.

2022 wasn’t my strongest year. I played 40 games, 31 of which were Middle-earth Startegy Battle Game (MESBG), and had an overall win percentage of 35%. My 2022 MESBG win rate was only 29% so my gaming goal for 2023 is to pull my MESBG win rate up to 50%. It’s a realisitic goal and shouldn’t be too hampered by the flights of fancy that strike me when I’m designing armies for events (I say this now, even as I’m planning at least one sub-optimal but exceptionally themed army for an event later this year).

The first event I planned to attend for 2023 was Fog on the Remutakas, a 650 point event held in Upper Hutt in February. The event was five rounds, with the opening and closing rounds playing the Fog of War scenario and he other three rolling from a subset of the matched play scenarios. The Fog event was part of a larger convention, Charicon 2023, which was raising money for charity and competitors could purchase a re-roll token (usable once per game) for $10.

Since the aim of this year was to redeem my MESBG win percentage I took the time to review the player pack and plan my army accordingly. I determined that two instances of Fog of War alongside the other potential scenarios heralded that it was time for the return of my Goblin-town army. It gave me a reason to convert the Goblin Mercenaries which I had been saving a sprue of goblins for, and to paint a new Gollum miniature to replace the one I painted quickly nearly two decades ago and haven’t been happy with even since. I also rebased the army… all 147 models…

The next step after choosing goblins was practice (see, I am taking this seriously); getting to know the army and getting to know the scenarios, especially Fog of War. Thanks to Minitrol, Alex, and James for letting me get my reps in prior to the event and I headed into the tournament weekend with three wins under my belt from four practice games.

Game 1: Fog of War

Ollie was a new opponent for me and he came packing winged heat. The Witch King and Khamul on fell beasts, Gorbag, and a mix of Black Numenoreans, Morannon orcs, and Orc trackers. This army was mobile and could cover a bunch of the battlefield with the Harbinger of Evil effect (making my Goblins effectively courage 1). One of my practice games was against a “Return of the King” Legendary Legion and in that game I practiced the technique of continuously rolling courage tests until I eventually I managed to get enough goblins into fights to bring my weight of numbers to bare. I knew it would be tough, but I figured I could do it.

As expected Ollie’s archers spent the game in his back field, picking off goblins with ranged attacks while the two Nazgul and the melee models surged forward to meet me. I spread out to prevent the Nazgul landing behind (or in) my lines, and Ollie’s early spells from the Witch King proved ineffective. A key part of my plan was to knock over the Nazgul with thrown goblins but Ollie ensured there were always multiple goblins in the way and I never had a clean shot.

My Mercenaries came in and claimed the terrain piece I had selected for the scenario, and Ollie promptly turned the Witch King around to kill the Mercenary Captain (his target) with a 4 dice channelled black dart.

My terror test rolling never hit the critcial mass I needed but when Ollie failed a cruical terror test to charge my Goblin King I followed it up by immediately… failing my own terror test, leaving the Goblin King glaring impotently and blocking my forces to a similar extent that Ollie had blocked his. I never got the upper hand, and I was outplayed by Ollie, and despite managing to get half of the available points I started the event with a 12-6 loss.

Game 2: Destroy the Supplies

I went in to the event quietly confident if this scenario was rolled up and I went into this game with that same confidence. Justin was running a Survivors of Laketown army and is too good a player to fall for my ‘stand still for a turn and try to make the opponent expose a weakness in their archery line’.

I thought the humans would surely fall to my wave of Goblins, however my inexperience was brought sharply into the light when I discovered that the Survivors of Lake Towns army bonus gives Bard a 12″ banner effect for the army. Twelve freakin’ inches. That’s a great army bonus. It also gives friendly models within range +1 to their fight value, gifting them a higher fight value than my Goblins. Between the (many, many) re-rolls and drawn combats no longer being tied, Justin’s army bonus was putting in the effort and getting the results.

Justin is a good player and, knowing he was unlikely to break through my lines and get to my supplies, played for a defensive win. While I was starting to make inroads on the side of the battlefield bereft of Bard’s buffs it was coming too late. Any additional Goblins I brought on were swiftly killed by archery and Gandalf or effectively blocked from reaching Justin’s supplies and after a long brutal slog the game ended in a 0-2 loss.

Game 3: Hold Ground

Bryan had a very in-theme “Return of the King’ legendary legion which had Aragorn, Gimli, Legolas and the King of the Dead each accompanied by three warriors of the dead. The maelstrom deployment worked in my favour in this scenario and it wasn’t long before I had swarmed the middle of the board and had comfortably surrounded the central objective.

My Goblin Scribe was rolling hot and continued to bring more Goblins on to the board, eventually surrounding the majority of Bryan’s force while also menacing and delaying Legolas. Bryan killed the Goblin King and put up a solid defence, preventing me from wounding Aragorn, but I finished the game with more goblins on the board than I started with and the objective firmly in my control allowing me to finish day one with a 7-2 win.

The evening was spent in traditional NZMEL style with dinner, drinks, and good company. We talked games, we talked community, we talked painting, we talked Middle-earth, and we speculated what the following day would bring. This is a key element of NZMEL events and the friendships and commeraderie is one of the reasons I continue to travel to play at them; you’re all a great bunch of people

Game 4: Command the Battlefield

I can’t remember the last time I played Lev, but it was before this blog and my gaming records started in 2018. Lev had a gorgeous Angmar army with Gulavhar, The Witch King, The Tainted and a host of Warg riders (and I want to note the Warg riders were all original version metal models).

Lev won initial priority and used his event token to re-roll this and lose priority. The malstrom deployment worked against me as my whole army came on, scattered across the board, and Lev then came on and viciously (viciously, I say) killed the Goblin Scribe with a black dart. My initial assaults on Lev’s forces failed to do any damage and retribution was swift and brutal.

After a few turns of being on the receiving end of vicious charging wargs and making minimal impact in return, I changed my game plan. My new plan was to spread out, gain control of board quarters, break, and then fail courage tests to get myself to 25% of my force and end the game. I ran the numbers and knew I had a great opportunity to do it in the following turn before Lev could effectively reposition his force. In the context of finishing the tournament with a positive win-loss result this was my opportunity to turn death into a fighting chance to live.

I spread out. I moved my remaining characters to key positions with clusters of troops. I brought in my Goblin Mercenaries to outnumber Lev in one quater of the board. I threw Goblins into hopeless fights and used piercing strike where I could to lower my defence. Everything was going to plan until my Goblin attruition rate slowed. My big play didn’t pay off, and I finished the turn one model off breaking.

After finally breaking the following turn my Goblins decided this was a great opportunity to make up for all their failed terror tests from the previous day and they passed lots of courage tests. I eventually had to sacrifice a goblin mercenary (and thus weaken my control of that quarter) to get myself to 25%, and the addional turn had allowed Lev to resposition and consolidate enough to turn my intended phyrric victory into a 2-7 loss.

Game 5: Fog of War

And back to Fog of War again to wrap up the event, this time facing off against Sam and his Last Alliance force. Sam has faced my Goblin-town in the past and, if you believe what he says, still has nightmares about his blunted cavalry charges and the Goblin Scribe bringing on additional goblins to shut him out and allow me to claim the win.

The game was going to come down to how fast Sam could break me. While I wasn’t too worried about his troops I knew Elendil could cause havoc with his free Heroic Combat each turn. Sam had a number of solid turns of inflicting goblin casualties utilising effective Heroic Combats with both Elendil and Gil-galad, the latter of which made sure to target my heroes so he could claim the Might back through the Blood and Glory rule.

The Goblin Scribe was having a good game and was bringing on a steady stream of goblins which I used to flank and trap Sam’s force. My weight of numbers slowly started to make inroads into his force but the game was still on a knife edge. Elendil and Gil-galad continued to slaughter elves and by the time I finally brought low the King of Númenor I was broken.

Gil-galad was still a threat but some solid courage rolling from the Goblins finally allowed me to cut the horse out from underneath him and over the next few turns, despite my Goblins continuing to flee due to being broken, I finally surrounded and killed the King of the Noldor seeing me finish the event with an 11-4 win.

So I finished the event with 2 wins and 3 losses across the five very enjoyable games. Thanks to Sam for running the event and to the Charicon organisers for a great time last month.

Wait, how is it almost April already?!?

Posted in Games Workshop, Middle-Earth, Miniatures games, Strategy games, Tournament, Wargames

The New Zealand Middle-earth League Final 2022

Another year, another New Zealand Middle-earth League (NZMEL) final. I always look forward to the League final, it’s a great way to wrap up the year and catch up with friends before the ‘silly season’ starts in earnest.

Earlier in the year I’d purchased some 3D printed ballistae to supplement my Isengard force, and the league final gave me a great reason to assemble and paint them for an Assault on Helm’s Deep force. The league final is an 800 point event and I figured there was an optimal number of ballistae to take at 800 points. My goal in building the army was to find that number and then add an extra ballista. Oh, and it had to have a demolition team (I love me a Bomb Squad).

The army went through multiple variations before I settled on the list I eventually took to the event. At one point there were 4 ballistae and at least 3 demolition teams, and memes were flying in my various SBG chats.

I eventually distilled the concept down to a force which contained 3 ballistae and 8 crossbows for ranged damage, an Isengard troll for combat punch, a demolition team for mass destruction, and probably not enough warriors to hold objectives.

“… and then this sick animal has brought, he knows who he is, he’s a sick animal, he’s brought three Isengard ballista as well.”

“This is so rude. Three ballistas and a troll and a bomb.”

S. Moffett and D. Ross (And They Call it a Mine)

Wait… have I gone too far? Has my crazy idea gone so far past unique that it’s actually competitive? Am I… am I going to win the 2022 League Final?

Game 1: Heirlooms of Ages Past

When I decided on a list with three siege weapons the Maelstrom deployment scenarios were a concern. In Maelstrom scenarios the siege engines get set up within 6″ of ‘your’ board edge, while all other warbands in each player’s army roll individually to see which board edge they arrive on.

In this first game of the tournament I had a mirror match with Adam, who had also brought an Assault on Helm’s Deep list, though his had a much more sensible 2 ballistae and a lot more troops. Against armies with siege weapons in Malestrom there is a roll off to see who chooses ‘their’ board edge for siege weapon deployment, with the opposing player getting the opposite edge. I won the roll off however the board we played on was very terrain dense with limited lines of sight. Without a clear advantage to a particular side I chose one which I felt had more options for sight lines with my three ballistae, knowing that those sight lines would work against me from the other side when Adam deployed his.

My forces ready to unleash hell.

With siege engines deployed we began the game proper. My first turn saw my crossbow Uruk-hai arriving, but not my Commander’s warband, while Adam had his whole army arrive. Turn 2 was a key moment in the game when I shot two of Adam’s ballistae crew, reducing his ranged output.

In Turn 3 Adam turned the pressure up with a Heroic March towards my left ballista. With a mob of Uruk-hai, including berserkers, bearing down on them I decided to send one of my siege crew on a sneaky dash for a nearby objective, and a lucky 6 revealed it was the item we were searching for. My initial excitement turned to concern as I realised just how outnumbered I was in that area of the board.

The enemy forces also ready to unleash hell.

Luckily my Commander arrived with his warband, including the Bomb Squad and after some delicate movement, avoiding terrain while trying to keep my Troll a threat but out of detonation range, I detonated the bomb. The sacrifice of my ballista was a price I was willing to pay to take out most of Adam’s warband but the threat was still there, including his Captain who only took 1 wound from the detonation.

The Isengard civil war escalates with the arrival of the troll and the demolition team.

Adam used the terrain and control zones to his advantage over the new few turns, blocking out my troll while sending a berserker to kill my Uruk siege crew member and claim the objective. On the other side of the board our crossbow warbands got into a fistfight which I came off second best in, and Adam then turned his attention on my ballista crew.

The enemy retreats with the objective in hand.

Having claimed the objective Adam’s plan changed to holding it, and the final turns of the game involved maneuvering, some aggressive crossbow and ballista shooting, and a lot of combat. I was fortunate enough to claim the object just before the game ended, allowing me to claim a 7-3 win.

A great start to the event, the game was tense right to the end and was my favourite game from day one. I also recommend Adam’s YouTube channel 3D Gaming which has a great mix of modelling, painting, and gaming content.

Game 2: Retrieval

Talk about a wild start to the event. Coming straight off a mirror match win with maelstrom deployment I was in the top bracket and matched against six time league winner Josiah and his Easterling force.

Josiah deployed close and spread his Easterlings out to minimise the damage my ballisate would do with their throw back effect. A solid tactic which would have served him well if I managed to hit anything in the first turn. At least in the second turn I managed to score a hit on the Dragon Emperor and knock him off his palanquin.

Ready to make sure there’s no dawn for men.

Josiah aggressively used Amdur to call heroic actions and attack my ballistae, confident in regaining the Might via the Blood and Glory rule as he rode down my Siege Veterans. My Uruk-hai diminished in numbers as he slowly tightened his vice and closed in on the center of my position. My shooting got a little better, but not enough to make a decent dent in his force.

Surely between the banner and the bomb I can deal with the Dragon Emperor.

Continuing his aggressive play, Josiah charged his Dragon Knight into my Troll and called a Heroic Strike to gain the higher fight value in the duel. My delight when I won the fight quickly turned to dismay as I failed to wound, and my counter attack the following turn turned into the death of the troll when I flubbed my duel roll and the Dragon Knight did the final two wounds to it (having lost one earlier to a throwing dagger).

Meanwhile the Dragon Emperor engaged my Commander, while Brórgîr used Tremor to deal with the impending threat of the demolition team, and also knocked my banner bearer down as a bonus.

Boxed in with my numbers dwindling.

My army was brought to break point and we rolled to see if the game ended, which it did… until Josiah used his army special rule to force a re-roll and the game continued. In fact the game continued all the way to me being wiped off the board resulting in a 0-8 loss.

Game 3: Storm the Camp

I was up against Dave for game three, and Dave had a double Mumak list.

Yes troops, walk out in front of those ballistae…

As a Mumak lover myself I loved Dave’s army, and the fact that he was running it at 800 points. I’ve considered a double Mumak army on many occasions but I was never happy with what I could do at 800 points to actually take the plunge.

Unfortunately for Dave the match up was a poor one for him, and I think we both knew how this game was going to play out. Some bad positioning from me resulted in me hitting my own troops with ballista shots due to in the way rolls, but I didn’t actually kill any of my own troops and after a couple of rounds of decent shooting the Mumaks were taken down, the majority of the crew died from fall damage, and the game ended with 4-0 win for me.

Dave’s double Mumaks!

Game 4: Contest of Champions

I started day two with a game of Contest of Champions against Matt T’s Last Alliance force.

My Uruk-hai Commander is a pretty cool guy (eh serves the #TrueWhiteWizard and doesn’t afraid of anything), but when compared to the combat prowess of Gil-Galad I knew I was going into this game as the underdog. We were playing on an awesome board with an Amon-sul type hill and ruin and knowing the main battle would be at the crest I positioned my ballistae at the foot of the hill with little obstructing terrain between them and the centre of the board.

Friendly fire incoming in 3… 2… 1…

I won initial priority and the usual ‘first turn of Contest of Champions Heroic Move calls’ came out. Matt won the Heroic Move roll off charged Gil-Galad into my troll and proceeded to surround and trap him with other elves. Cirdan had also called a Heroic Channeling and cast Blinding Light which Matt piloted to good effect for the remainder of the game.

After wounding my own commander by shooting him in the back with a crossbow shot (the shot into combat seemed like a reasonable risk at the time and I’d probably take it again) I called a Heroic Combat allowing me to slingshot my Commander into an elf behind the troll, killing it (using my last might) and ensuring the troll wasn’t trapped when it came to the troll/Gil-Galad combat. The troll still took a wound, but it could have been much worse.

Let the contest of champions begin… pay no attention to that bomb there (please).

Matt took the opportunity the next turn to get Gil-Galad into combat with my Commander. After again wounding my own commander by shooting him in the back with a crossbow shot (I told you I’d probably take the risk again) my Commander was promptly cut down by Gil-Galad in combat making victory (or even a draw) that much harder.

Cirdan’s blinding light was blunting the effectiveness of my shooting so when I saw an opportunity to slip through and into combat with Cirdan I took it and managed to get a wound on him. The Elves took umbrage and smote the Uruk-hai the following turn but the small victory kept me focused on my plan to claw back some points in the game.

Despite the Blinding Light I scored a direct hit with a ballista on his mounted Rivendell Knight. The cavalry based model flew back 6″ down a line of combat. This was my chance to swing things as I had an opportunity to take out seven of Matt’s models with risk to only three of mine. Unfortunately it was not to be and after the wound rolls Matt had only lost one elf and one horse while I had lost 2 Uruk-hai. My other ballista shot which hit that turn had a similar effect with another three of Matt’s models knocked down without being wounded, and the turn was rounded out by Gil-Galad killing the troll in combat.

It doesn’t look like it, but I actually came off second best from this.

Matt advanced down the hill, keeping his force within Cirdan’s blinding light effect. By the time I managed to hit Gil-Galad with a ballista shot (doing no wounds, but at least knocking him off his horse) Matt was almost upon my siege engines and my options for minimising the loss was down to 1 potential victory point for breaking my opponent’s army. In the true spirit of the fighting Uruk-hai we (mostly) held our ground and tried to give as good as we got. A random siege crew fought valiantly on the right, and another opening allowed me to finish off Cirdan and get the crucial kills I needed to break Matt’s army, the game ending not long afterwards with a 1-9 loss.

Game 5: Domination

A semi-mirror match for Domination as I faced Matt S’s Isengard horde list, headed up by Lurtz, Ugluk, and Vrasku. We’d positioned 4 of the 5 objectives in terrain pieces (including a forest, a swamp, and a pond) which was going to make for an interesting game, and with fewer models than Matt I knew I would need to even the odds with shooting as much as I could before the melee began.

Those of you who have read my tournament reports before know that by game 6 in an event I’m mentally fatigued and start to make elementary errors. Well, it seems my mental fatigue kicked in at game 5 this time as I stupidly deployed one of my crossbow warbands in the firing line of a ballistae.

Top tier deployment…

In the first turn Matt used his drum and advanced, while I did some repositioning and very little damage with shooting. Feeling buoyed Matt tried the same tactic the following turn, but this time gave me a great flank shot on his front line which I exploited, taking out six models in the front of his pike block.

Losing priority the following turn I called a Heroic Move to keep myself out of combat for another turn, trusting that my ranged weaponry would again do some damage before our ranks engaged in combat. The move was good, but the subsequent shooting didn’t go quite as well as planned. While I did take out some of Matt’s Uruk-hai, his banner survived multiple hits. In return my Troll and my demolition team were shot off the board, taking some much needed punch out of my army.

Isengard civil war II, Ballista Boogaloo

Matt engaged the ballista on my right flank, and while I held off valiantly (my trapped captain managing to survive 14 wound rolls one turn), the weight of numbers he was able to bring to the fights meant that I was losing the war of attrition. Matt’s greater numbers slowly wore me down resulting in a 1-9 loss.

An unlikely escape for my Uruk-hai captain.

Game 6: Fog of War

My last game was against Tom and his Lothlorien force, with an allied Gildor. Having to choose between Gildor and Haldir as my targets to kill, I basically handed my opponent the game due to not thinking things through. I chose the softer target of Gildor who, with an eleven cloak as default wargear, Tom chose to keep safe and deployed him in a copse of trees safe from all my ranged weaponry. I only have myself to blame for that one.

Same board, same ballistae positioning, different result?

The game itself was a great game. A direct ballisata hit on Haldir on the first turn saw him use all three Might points to stay alive while the Noldorin Exiles swiftly started covering the distance to my right-most ballisata (that 8″ move was looking pretty scary).

The troll went down to the concentrated elven shooting before our lines met. Tom was trying to catch my main warband in a pincer maneuver, with Haldir and Celeborn each in one side of the pincer, but a ballista hit on Celeborn knocked him back enough to take the pressure off (he was wounded but he passed his fate).

This allowed me to get the demolition team in position and detonate it. While I lost more Uruk-hai than I really wanted to, with the Troll gone and my numbers dwindling I couldn’t afford to be picky. I also knew the detonation would mean Tom’s force was broken.

Celeborn’s channeled Aura of Command meant the number of elves taking courage tests was minimised on my left, but I was lucky enough to have a few of the Noldorin Exiles on the right flee. I quickly got to work claiming the terrain piece which Tom was clearly trying to capture, while I did the same on his side of the board for the one I was trying to capture.

The game continued for a couple of turns after Tom broke, resulting in me also being broken and eventually brought to more than 66% casualties meaning I also needed to start rolling courage tests. When the game finally came to an end there were only 15 models left on the board (5 of Tom’s and 10 of mine, excluding ballisatae), however Tom had killed his target and kept Gildor safe resulting in a 4-7 loss for me.

This one was a great back and forth right to the end. It was my favourite game of day 2 and a great game to finish the event with.

An almost deserted desert.

So, it turns out my filthy list wasn’t a League Final winner – well, at least not in 2022 while commanded by me. I’m already plotting and scheming my army list for next year, but there’s plenty of time between now and then for that to go completely off the rails.

As always I had a great time at the event, and it was great to catch up with a number of the league players before the end of the year. Thanks to all my opponents, to everyone who attended the event, to everyone who helped with the event, and to George for his efforts as league coordinator.

Posted in Games Workshop, Middle-Earth, Miniatures games, Strategy games, Tournament, Wargames

Abandoning Reason for Madness at the Battle for Avon Hen 2022

What started off as idle postulation ended with me taking my most unorthodox army ever to an event.

When I saw the one that I now know to be yours, I swore, laughed, swore again, checked the FAQ to see if it was even legal, then sat and stared into space for 20 seconds. You’re a genuine source of concern.

S Moffett

Those of you familiar with me and this blog know I like to play Middle-earth Strategy Battle Game (MESBG) for fun. I may be a tournament veteran but my main focus is having fun, playing games with good people, and playing with lists which people have never seen before.

Demolition charges? Doing it before they were cool, back when a roll of a 1 meant it was a dud and you removed it from the board. Men of the West? Horses are overrated anyway. Dangers on the Road to Bree? I don’t care that I have points left – it’s all about theme here.

My latest idea was about how frustrating it would be to have a Mumak War Leader and Wormtongue both right up in your face. Correctly positioned your opponent would need to spend 2 Might to call a heroic move, and the War Leader then had a 50% chance to cancel the first one each turn. Nice as a thought exercise, but I wouldn’t run it… obviously.

It was like a fever dream. I just couldn’t shake it, no matter how hard I tried. I finally ran the numbers (605 points for Saurman, Grima, and the War Leader) which put the idea to rest until the Battle of Avon Hen 2022 was announced.

The Battle for Avon Hen 2022 was a five round tournament where each player brought a good and an evil army of 700 points each. Games were Good versus Evil and at the start of each game players rolled off to see which force they used for the game.

At 700 points if I put Saruman and Grima on horses and filled the Mumak’s howdah with Haradrim it could work, but some madness inside my head kept telling me that solution wasn’t ‘right’. The theme (loose as it is) was frustration, and denial, so instead of Harradrim in the howdah the obvious complement for my remaining 75 points was a model that returned from the dead: The Witch King, Nazgul of Dol Guldur.

It made the army Impossible Allies but with a maximum of two models in any force and a total model count of five I’d basically already lost if I took a casualty anyway, and not being able share heroic actions wouldn’t be too bad. So that was it, 700 points on the dot.

I took a Return of the King legendary legion for my good army but let’s face it, if you’ve made it this far and haven’t given up in disgust you’re not here for that.

Game 1: Storm the Camp

For the first game of the event I rolled to use my evil force. While I knew I would be starting with a model in my opponent’s camp (Grima), I also knew my lack of numbers were severely working against me in this scenario.

My opponent, Sam, had a Return of the King legendary legion, so my plan was to avoid having both the King of the Dead and Aragorn engage the Mumak at the same time, and hope that I could do enough damage to the main bulk of his forces before they got too many opportunities to attack with with their Blades of the Dead which wound against my Mumak’s courage value (3) rather than defence value (8).

That not-green fellow in the background is a totally friendly model just hanging out in the camp.

Sam locked Grima up inside his camp by surrounding him with three equidistant warriors of the dead. In any other scenario it would be great to tie up three models almost indefinitely, but with Storm the Camp Sam needed to keep some models back in his camp anyway.

The main part of the game was some good cat and mouse. Sam used the terrain to his advantage to keep his warriors safe, but after a couple of minor tramples he managed to complete his flanking maneuverer. I lost the heroic move roll-off and my Mumak was sandwiched between Aragorn and the King of the Dead, and a single strike from the King slayed the Mumak instantly due to the Drain Soul rule, leaving my War Leader surrounded by a bunch of angry ghosts and two Kings. His time was numbered.

Kali Ma!

The Witch King continued to resurrect and harangue Sam’s army, while Saruman went off to try and hold Sam’s camp in a ploy to claim some victory points. Time ran out before he could get there (Saruman was just on the edge of the camp area) and the result was a 0-12 Crushing Loss.

A last ditch effort to capture the camp before the game ends.

Game 2: A Clash by Moonlight

I was playing my evil list again for this game, and I was up against Thomas with a Riders of Theoden legendary legion.

DEATH!

Thomas trapped Grima with some equidistant ‘friends’, and pushed the rest of his army up quite aggressively in his first turn. My Heroic March in the second turn made him realise very quickly that his positioning was wrong (three dead Riders of Rohan is a bit of a wakeup call) and he immediately charged in to try and get some wounds on the Mumak. I lost the combat but my defence held and I took no wounds.

I used the palantir to win priority in the third turn, and with Theoden and Eomer right in my trample line we had our first Heroic Move roll off of the game. Thomas won the roll off, charged some Rohirrim into the Mumak and managed to inflict a wound. Elsewhere the Witch King was being killed by a Royal Guard, but I was confident he’d be back (spoiler – he was).

Turn four saw me win priority and this time the Heroic Move roll off went my way. Theoden was trampled and Eomer took two wounds, alongside a cast of dead Rohan extras. Saruman was being threatened by some flanking Riders who would eventually go on to shoot his horse out from under him. My channelled Terrifying Aura, combined with the Witch King’s Harbinger of Evil was keeping him out of combat and mostly safe.

Unmounted, but not unarmed… because magic. #TrueWhiteWizard

The next couple of turns consolidated my win, including the bold move to trample both my Witch King and Grima to get Thomas’ army to break point. The Witch King promptly returned next turn and after some additional trampling and a round of low courage tests from Thomas the game ended that turn with me claiming a 12-0 Crushing Win.

Game 3: Destroy the Supplies

Taylor was my opponent for the final game of day one. We had a quick pre-game check and found that both of us had used our evil forces in the previous two games, and roll this game saw me use my Return of the King force for the first time, facing off against an Angmar army with Gulavhar, Terror of Arnor and a mass of orcs and spirits, including The Dwimmerlaik, a Shade, Barrow-wights, and Spectres. I love this army, but have been on the receiving end of it on many occasions.

The hosts of Angmar.

I decided to form a defensive line and make Taylor come to me. His army had enough tricks to paralyse and pull me out of position, so I held back and made him cross the river to get to me. With my high defence and courage I thought I would be able to react better than to try and force an error on the attack. I also knew I needed to keep my force close enough together that Taylor couldn’t get Gulavhar in to start destroying my troops because I was too spread out.

I used Legolas’s 2+ unmodifiable shot in the first turns to bypass the orcs in the way and do a wound to Gulavhar, and to target some of Taylor’s priority units. Taylor got his Barrow-wight in close enough and paralised Aragorn, so I promptly moved warriors of the dead to help revive him. Gulavhar was swinging around the back of my lines, trying to keep out of sight of Legolas while waiting for an opportunity to strike.

When our lines clashed I began a string of failed combats, and while my high defence kept me alive for a while it was a battle of attrition I wasn’t winning. With the way my dice rolls were falling it was a battle of attrition I didn’t think I was even playing.

Frantically trying to protect Aragorn while he’s paralysed.

Aragorn spent most of the game on the ground, but I played well enough to keep Gulavhar away from my heroes until Aragorn had recovered. Despite being on the back foot a glimmer of hope came when Gulavhar, having used all his Might, charged into Aragorn and rolled a 4 as his highest roll. Unfortunately Aragorn rolled the same and was forced to try and use his last Might point to win the combat and dispatch the Terror of Arnor. Taylor had closed his trap though and The Dwimmerlaik was in range and rolled a successful Sap Fortitude roll. With no additional Might to spend the combat went to Gulavhar who promptly killed Aragorn, and the game was over not long after that.

I had sent a couple of Warriors of the Dead from my right flank to destroy Taylor’s supplies but the game ended before they got there and I finished the day with a 0-8 Crushing Loss

Severely outnumbered as the game ends.

Game 4: Command the Battlefield

I always enjoy my games against Kev. He’s that great mix of personable, fun, and competitive. The roll off resulted in me playing with my evil force for this game against Kev’s Khazad-Dum dwarf force led by Durin.

The scenario involved holding quarters of the board for victory points and maelstrom deployment (warbands start off the board and can arrive via any board edge as determined via a die roll) so I knew this game would be determined pretty quickly by where and when the forces arrived. I needed to do as much damage as I could before Kev could spread his Dwarves across the board and it became an exercise in futility for me trying to hunt them down.

Added to this was Kev’s Dwarven ballista. If my Mumak wasn’t engaged in combat each turn the ballista would be free to shoot at it and it had a good chance of whittling it down.

That’s a lot of speed bumps.

I’m happy to say deployment went my way. Kev’s forces all ended up arriving on one board edge together in a clump (with their friend Grima in tow), and my War Leader diligently came on the same board edge and began the trampling.

I won priority for the second turn. “Oh, I see how this synergises” was Kev’s line as he looked to call Heroic Moves and found most of his heroes in range of Grima. Kev baited out the War Leader’s Heroic Move cancel with one of his King’s Champion Heralds then called another Heroic Move with Durin. I countered with the War Leader and won the roll off and the trampling began.

“Oh, I see how this synergises.”

As expected I stopped at Durin (defence 9, a 6+ save from the Crown of Kings, 3 wounds and 1 Fate), but I had at least brought the King of Khazad-Dum down to only 1 wound remaining. Kev took the opportunity to pile in as many dwarves as he could to try and bring the Mumak down, and succeeded in doing five wounds to it. Ironically, these five wounds are what won me the game…

The third turn was similar to the second, with Heroic Moves being called and counter-called, me winning the roll off and trampling a number of dwarves (including killing Durin) and my trample being stopped by the King’s Champion. And this is where those five mumak wounds last turn won me the game; because Kev had successfully brought the Mumak to half wounds the previous turn he committed to the fight again rather than send more dwarves to capture quarters. Kev did manage to do another three wounds to the Mumak (bringing it to only 2 left), but when I took priority with the Palantir the following turn there was nothing Kev could do to stop me trampling over the King’s Champion and a good portion of his remaining army, bringing him to 25% and ending the game with a 4-2 Major Win

Bonus game: Command the Battlefield

I always enjoy my games against Kev. Kev is that great mix of personable, fun, and… wait, what? So, our first game was so over so quickly that Kev and I agreed to play the scenario again with our alternate forces: my Return of the King against Kev’s Isengard.

This game was almost the complete opposite of the previous, and my army ended up coming on behind Kev’s, getting caught between it and the edge of the board. Kev channeled Fury with his Uruk-Hai Shaman, negating my Terror advantage, and my lower Fight value saw me hemmed in and whittled down. Kev played the scenario this time, sending models to secure board quarters early, resulting in a 2-10 loss for my Bonus Game.

Hemmed in by a wall of Uruk-hai.

Game 5: To the Death!

For the final game of the event I was playing my Return of the King against Ashton’s Barad-Dur force, lead by Sauron himself. The board was awash with shades of green as our similarly painted forces were deployed. We were both a little concerned that the similar colours would make it a bit confusing when we got in to combat, but there was enough difference in tone and basing that it never became an actual issue.

These armies need more green.

We both started the game marching towards each other. Sauron failed his Chilled Soul attempt on Legolas who retaliated by shooting an orc. When the battle lines were within charge range of each other priority went my way so Sauron called a Heroic Move. I countered with Aragorn but the roll off went to Sauron who prompty retreated to position terrain between himself and my two Kings. Having been on the receiving end of this in my first game I understood the tactic.

An army worthy of Mordor.

Ashton’s move forced the main thrust of the combat into a narrow channel between two terrain pieces, limiting my ability to bring numbers to the fight while allowing him to reinforce his orcs with a back rank of spears. I started to send some Warriors of Dunharrow around the back, but I knew it would be a couple of turns before I could close that trap.

The main game centered on the channel from that point, with both of us doing our best with our ancillary forces to help and hinder where we could. Ashton had a ringwraith flinging Transfixes into Aragorn and some Warg Riders trying to do damage to my back lines while I had Legolas taking shots where he could to try and take out specific targets or create openings.

Sauron managed to engage the King of the Dead, so I moved Aragorn and a Warrior of the Dead into an intervening orc, ready to slingshot them in to support the King following a Heroic Combat. I called a Heroic Combat with Aragorn and a Heroic Strike with the King of the Dead, and Ashton called a Heroic Strike with Sauron. I knew it was a risky play by me as I called the Heroics, but with the King of the Dead already in combat, and with Sauron able to do Brutal Power Attacks (including Barge) I made the call to try and take control of the flow of the battle.

We three kings

The Heroic Combat went as expected, but I rolled low on the Heroic Strike leaving Sauron with the advantage. I lost the fight and Aragorn paid the ultimate sacrifice. My combats elsewhere were going very well though, as Orcs fell to the Blades of the Dead and Ashton’s Ringwraith, having cast all the spells it could, dissipating after a final combat. At this point I started to make Ashton’s defensive channel work against him, as he was unable to bring Sauron to bear on the bulk of my remaining forces, and I even managed to get a lucky wound on Sauron with a Warrior of the Dead.

After a few more turns of killing orcs I managed to reduce Ashton’s force to below 25%, though with Sauron still on 4 wounds he didn’t count as Broken so when the points were tallied the result was a 4-4 Draw.

Not my finest hour with this duel roll.

2 wins, 2 losses, and 1 draw really is the definition of a mid table result (which is where I finished), and I even got to enjoy a bonus game too. My Mumak list went 2-1 at the event for an overall lifetime result record of 3-2, which is the perfect result to allow me to put it to rest. The fever dream is over, and you can all feel safe from this kind of nonsense from me in the (immediate) future*.

A shout out to comrade Justin for running the event, to each of my opponents, and to Alex and Job for joining me for trip (with a special mention to Alex for driving, and a special mention to Job for talking about Huorns).

*Other nonsense will likely still occur. If you’re interested in knowing more about my crazy list ideas ahead of time then drop me a line; I’m sure I can sort out some sort of paid subscription arrangement.**

**You can of course use our Mighty Ape referral link when buying or pre-ordering from them, which is always appreciated.

Posted in Games Workshop, Miniatures games, Strategy games, Wargames

MESBG Tracker review

Players should also ensure they have a system for recording Might, Will, Fate, and Wounds in the course of their games

Every tournament pack ever

If you’ve been to an organised Middle-earth Strategy Battle Game (MESBG) event you’ll not only have read this sentence, but have also needed to think about how you’ll track your stats. Even a casual game with more than a couple of heroes requires a robust method of keeping track – nothing kills the momentum of a game like having to stop and have a discussion about whether a hero has used all of his Might (“I did that heroic move near the start, and then…”).

A recent arrival in the MESBG support space is MESBG Tracker – an app designed to track hero stats as well as other important game tallies such as break point and kills.

I had chance to use MESBG Tracker at two events now (The Battle of Five Regions and The League Goes South) the second of which I used an all hero army – The Breaking of the Fellowship, so I’m in a good position to give it a review and my recommendation.

To get the conflict of interest statements out of the way, I was involved in testing the app. Additionally, I know the makers of this app. This is not a paid review.

So, what makes MESBG Tracker better than the other options out there?

Like the other options out there, it allows you to load up your heroes and remove stats from them as they expend them throughout the game. Updating stats during the course of a game is simple – tap once to reduce that stat by one, double tap to increase the stat by one.

But let’s face it, this counting functionality is the bare minimum you expect from a MESBG stat tracking application and there are a wide variety out there allowing you to do this. The MESBG Tracker adds value with what it does above and beyond that.

Above and beyond is a nice segue into the first advantage of MESBG Tracker, that being infinite POWER!… Err, I mean stats. Unlike most other options out there MESBG Tracker knows there are times you need to go above your starting values. Pull off a successful Heroic Challenge and gain D3 Might? MESBG Tracker easily lets you easily add those extra Might points and doesn’t cap it at the starting value.

Aragorn with 7 Might from all the Heroic Challenges he’s won. What… it could happen.

Heroes are saved in the app independent from armies. This means you only need to enter each hero once, then you can attach them to whatever army roster you make.

Once you’ve added your heroes into the app, it’s easy to add them to any army you make.

There’s also the ability to duplicate heroes in your roster, meaning you don’t need to manually enter the stats for Goblin-town Captains #2 through to #17 – just duplicate the first one and rename them (or not, it labels them as 2, 3, 4, etc. as your duplicate them).

Duplicate! Replicate! Down down down in Goblin-town (not pictured – any Goblin-town captains)

You can add a counter to each army you create which you can label and use for whatever you want. Foresight points, the Palantir, Lurtz’s shield throw, extra Gobin Town goblins summoned, throwing weapon kills – label it and use it as you will. In addition each character has their own Kill tracker, so you can easily track Leader kills in Contest of Champions or Legolas and Gimli’s kill count.

The interface is simple and easy to use, and you can tell it’s been designed by players who want to make game admin easier, so what really makes this app great are the small quality of life features.

When you take the last wound off a hero the casualty tracker automatically increments by one; if you’ve made a mistake and add a wound back to a dead character the casualty tally reduces by one. Dead heroes display with a line through their name and little headstones to either side. Dead heroes are listed below alive heroes. Your Leader is denoted by a helmet symbol and always shows at the top of your hero roster (until they die, at which point they show at the top of the dead heroes section).

Only Gimli and Frodo left alive – not the Fellowship’s greatest hour.

You set your break point percentage when making your army, then the counters at the top count down how many casualties you are away from breaking and quartering. A quick swipe to the side changes the casualty count to an incrementing % count, useful for when you’re running Isengard and want to keep track of the 50% broken vs 66% Uruk-hai taking courage tests.

The casualty tracker is anchored at the top of the screen – no matter how many heroes in your army, the casualty tracker always shows at the top of the screen when you’re scrolling through your roster.

The casualty count remains on screen as you scroll through your heroes

It’s not just one off games which the app is great for though. The trackers retain their previous state until they are manually reset, meaning the app is a great way to keep track of a heroes across a campaign, whether that be the Journey of the Ring-bearer, Fantasy Fellowships, linked scenarios, Battle Companies, or any other continuous or linked games you’re playing.

Price

MESBG Tracker works on a subscription payment model: 99 Earth cents per month, or $9.99 Earth dollars for a year. I say Earth dollar as the prices are regionally set at 0.99/9.99 for NZ$, AU$, US$, £, €.

Upon initial sign up you get a month’s free trial, so it will cost you nothing (that’s $0 Earth dollars) to check it out for yourself.

The competition

I know there are options out there, ranging from free webpage trackers, subscription models, and one-off purchases, and at the end of the day these are all competing against and the ubiquitous pen and paper. As someone with a gaming blog I’m already using pen, paper, and photos to record my games anyway, but MESBG Tracker allows me to keep my game notes ‘clean’ from my game admin.

Let’s just do a quick recce of the other digital options out there and see what else is available in this space. There are two main contenders out there: SBG Hero Tracker and ME SBG: Stat Tracker.

SBG Hero Tracker:

SBG Hero Tracker is available both as an app and a webpage. The app is a one-off purchase NZ$1.59; the webpage is free. The increase stat interface is a + button which appears after a stat has been changed from it’s starting value, taking up vertical screen space. This also means Stats cannot be increased beyond starting value, as the + button disappears when the stat is at the starting value.

Like MESBG Tracker it keeps track of casualties, broken and quarters and individual character kill counters add to the opposing army’s casualty count, however the casualty and kill counts only go up – you need to use the Undo function to decrease these – and the casualty tracker leaves the visible screen as you scroll down the list of heroes.

It lists heroes in alphabetical order which means Anborn takes pride of place over Aragorn (as does Angborn who is his second cousin and definitely not misspelt name).

ME SBG: Stat Tracker:

ME SBG: Stat Tracker is a free app and their big point of difference is that the app comes with hero stats both pre-loaded and organised by Army lists and Legendary Legions.

The pre-loaded stats are great however the in game interface is not streamlined. Each hero’s stats is comprised of three lines: a row of up indicators at the top, a row of stats, and a row of down indicators at the bottom.

Heroes are listed in the order they are added, and when you take the last wound off you need to tell the app what you want to do with that hero, and if you choose to keep them on the roster the hero displays with a wounds value of ‘?’. The app does allow you to go above starting values, gives a prompt when it does so, and shows the value in red.

The description for ME SBG: Stat Tracker states there is a subscription option, but I was unable to find it. Without a subscription the app has ads, and there is no casualty and kill tracker functionality. While I admit my inability to find the subscription option may be due to the age of my phone, it was a barrier non the less.

Recommendation

So, it has come to this: do I recommend MESBG Tracker? Yes, yes I do. It’s made my games easier to play, easier to keep track of, and the interface is the best out of the various tools I’ve tired (including my trusty pen and paper). I was originally planning to do sporadic monthly subscriptions to the app as I attended events throughout the year, but after using it at The Battle of Five Regions it was a no brainer for me to go in for an annual subscription.

I recommend it to the point of actually recommending it in the Player Pack for this year’s ‘The League Goes South’ event.

It’s also made in New Zealand, so it’s basically a ‘Made In Middle-earth’ product.

As previously mentioned, you get a month free on initial sign up so you’ve got nothing to lose by checking it out.

MESBG Tracker is available for on both the Apple App Store and Google Play.

What is #DamianMeta
Posted in Games Workshop, Middle-Earth, Miniatures games, Strategy games, Team games, Tournament, Wargames

The Battle of Five Regions 2022 Day Two

PhantomNuisance (PN): Let’s not waste time recapping stuff we’ve already written; if you want the ‘Previously on’ you can read about Day One here. Day Two lies ahead, with our team goal to finish the event with triple digits of victory points (something all of the other teams managed on Day One)

Minitrol (MT): Okay say it with me. First Turn. Channel Blinding Light.

Game 4: Hold Ground

MT: Owing to the nature of the tournament up to the final round we were matched as a round Robin and only in the last round would it be matching the Teams to play for First, Second , and Third Etc.

So, in the fourth round we faced the terror of the Team with no Name. This was a fiercely competitive team. Not in a bad way each player is a lovey human but they are all very experienced tournament winners.

My first match of the day was against a Morannon horde with Gothmog, Kardush, and the ever loathed Guritz, Master of Reserves and, unfortunately, this was another Scenario my list was ill-suited for and his was ultra honed for.

From turn one I was on the back foot with the manipulation of the reserves roll meaning my warband led by Denethor didn’t get to choose where he came on and was surrounded by an entire army.

Ever feel surrounded?

My other warband likewise didn’t get to choose and this time I opted to use Gandalf as an artillery piece popping out of cover to transfix Gothmog, and the occasional Sorcerous Blast.

A Single Rider Clothed in white

In short, while I was incredibly on the back foot I vowed to make the victory hurt. So looking at the victory conditions there were points to be had for wounding and killing the enemy leader so this became my plan. Though my entire army was slaughtered Gandalf fought on till the game timed out managing to get Gothmog down to one wound and no Fate but he (rather dishonourably) lay down behind a wall so he could not be targeted!

Hatred of Men!

So my first point of the tournament!

PN: Rohan. With throwing spears. So my army but with better stats and fewer wargs. And a better leader in Helm Hammerhand with Mighty Hero rule for the Helm’s Guard legendary legion.

It was Maelstrom deployment (warbands can enter via any board edge, based on a dice roll) and my Legendary Legion gave me special rules allowing me to charge on the turn I arrive. It also allowed me to bring D6 models on to the board before the first turn of the game. I rolled a 3 and brought on 3 wargs to race to the centre and hold the objective, planning that the rest of my army would do the work of harassing and killing the enemy.

My opponent got the first turn and almost none of his army arrived at the end of his movement phase. I rolled OK, and with barely any enemies on the board I chose to save my Might rather than use it for a minimal advantage of my special rules.

Surround them, zig-zag, capture them in a pincer maneuver.

The following turn was when things got interesting. Charges were made, spears were thrown, Wargs dies (including my Captain’s warg to a friendly throwing spear).

Things weren’t going my way so my shaman threw out a cheeky transfix to gain a combat advantage but it didn’t pay off. The following turn, after taking a number of casualties, I decided to use the shaman to channel Fury to try and save my Orcs which had started to die too quickly. My mistake here was forgetting I’d already used a Will and then casting Fury with two dice, getting a success then realising that it automatically ended due to being exhausted.

Things are starting to look a bit dire

Things didn’t get much better for me from that point, though I did manage to get my opponent to break point but we both broke in the same turn. After a turn worth of fleeing warg riders the game promptly ended. With no friendly models within 6″ of the objective (because I had no models left on the board) and my leader dead the final score was a 1-10 major loss.

Only Rohan left on the board

Game 5: Divide and Conquer

MT: Not a scenario I had ever played before. Deployment is in diagonally opposite corners with three objectives. I was up this time against a fierce Uruk-hai scout force. It was a lovingly painted and expertly commanded force.

I was super taken back by the speed of this force. With extra movement and Heroic Marches it quickly massed two of the objectives.

So pretty but so deadly

At least they weren’t highly armored I thought as I rushed forward to kill them honorably in a series of duels Except they are still Fight 4 so won more combats than me overall and my Shieldwall army bonus (+1 bonus to my Defence IF base-to-base with two others who also have this rule) when it comes to the practicalities of the scenarios is really difficult to maintain.

Denethor Demands that you Serve

It wasn’t long before I was broken and the game mercifully ended shortly after with, again, maximum points to my opponent and zero to me.

Tooo sloowwww

Oomph.

PN: I was up against an Armor army for this scenario meaning I was facing high defence and Foresight saves. Even then I was feeling quietly confident as I knew I would have speed on my side.

Speed is on my side.

My throwing spears had little effect and it was combat where the game would be decided. Even with the wargs’ strength of 4 I was struggling to wound, however in return most of my wargs were remaining in the game after their riders were slain.

It was a drawn out fight I gained the upper hand in and broke my opponent. King Arvedui’s 12″ stand fast kept the Arnor forces in the game and my daring strike at the King in the back lines ultimately resulted in Sharku being trapped and killed. The game ended not long after and with the objectives under my control I claimed my first win of the event 8-3.

Wargs for the win!

Game 6: Seize the Prize

MT: In many ways I hate this scenario. I’ve seen a cavalry force sweep in pick it up and Heroic Move away for the rest of the game and also I’ve seen the first person to get there fail their roll to pick it up three turns in a row.

It is no Storm the Camp. This Scenario has always felt like a Narrative Scenario squashed into the Competitive mould.

The “Relic”

Anyway this was a great narrative game with story driven moments of glee.

I was facing the Mirror of PN army another Wolves of Isengard list – if I lost priority here there would be no chance of recovery.

Slavering Wargs

I won priority.

Gandalf and Shadowfax careened through the centre. I didn’t dismount but I had channelled Terror and he remained stoic by the Relic.

My Favourite picture of my Army

He channelled Fury negating my Terror.

Wolves moved into block while the Warg cavalry pushed up to prevent me supporting Gandalf.

Gandalf laughs at these odds. Seizing priority again and again Heroic moves were issued and countered buffering back and forth.

Ware the Right Flank!

Denethor and his bodyguard threshed wargs like wheat! The Steward showing something of his mettle from before his mind Broke.

Then my opponent set up for his play passing the Relic successfully then winning Priority the next turn he pinned my Warriors. It would be okay as long as I didn’t lose too many combats.

Unfortunately I lost the flank combats and with Warriors knocked prone they had no control zone for pinning the wargs who spread their net and the Relic bolted for safety of my board edge.

It had been an epic game in great spirits and played till time was called!

PN: In the last round I was again against a Helm’s Guard Rohan force with Helm Hammerhand and a lot of throwing spears, though thankfully with fewer mounted models than the previous one.

My opponent Heroic Marched in the first turn to get closer to the objective. In return I threw a bunch of throwing spears at Helm which caused a wound, though my opponent saved it with Fate, denying me an early victory point.

On my signal, unleash hell.

My opponent positioned himself well, using the terrain to his advantage to prevent my cavalry charges. Helm resisted the transfixes directed at him by the shaman, and my opponent dug up the objective to take the advantage.

Those Warriors of Rohan held the line well

The remainder of the game can be summed up simply with ‘no heroic roll offs went my way’. With limited might vs Helm’s Mighty Hero rule I eventually ran out of might and, unable to get a solid cavalry charge off, my force was eventually broken for little losses to my opponent, ending the game as a 0-10 crushing loss.

Conclusion

PN: We did it. We ended with triple digits of victory points. We were also also voted best themed team, so thanks to our opponents for recognising the awesomeness of hats and badges.

Anyway, what a great weekend, six games against six good opponents and playing alongside three great teammates.

The Wolves of Isengard legion was a lot of fun to play. I’m glad I took the opportunity to play it at an event, and I wasn’t the only one who took advantage of the lower points value as there was one other Wolves of Isengard list there in addition to mine.

It was the first time I’d taken an all cavalry list and while I learnt a lot there’s still more for me to master in this space. I’m looking forward to my next outing.

The dogs of war.

MT: I didn’t know what to expect. I knew being a very fluffy list of older profiles I would be up against it but some army list bonuses and profiles took me so much by surprise.

I had predicted my weakness to range, lack of might and inexperience with Gandalf the White and these played equal parts but also in each game I could have blunted the loss and sought what points I could. Some good lessons learnt.

All my opponents were gracious and accomplished players who provided advice throughout but never in a pushy I Can Play For You Manner.

It was a great experience and I would definitely do another team event.

Posted in Games Workshop, Middle-Earth, Miniatures games, Strategy games, Team games, Tournament, Wargames

The Battle of Five Regions 2022 Day One

The Battle of Five Regions 2022 was a six round Middle-earth Strategy Battle Game (MESBG) team event held in Wellington in April 2022. Team size was four players with each team bringing two evil and two good armies of no more than 555 points each. Teams were paired off each round with games paired within the team pairings as 1v1 good versus evil games.

The event attracted six teams, so the event was run as a round robin with the final round being paired by overall placings. In the final round individual players were paired against the army which they did not face in the round robin.

PhantomNuisance (PN): I was really happy when Minitrol was keen for the event (we hadn’t been to a SBG event together for a number of years). We teamed up with a pair from Christchurch and dubbed our team the Shirrifs of the Southfarthing (having the Southernmost representation of any team at the event) and promptly started brainstorming team costume ideas (cowboy hats and sheriff badges were surprisingly efficient).

In my continued exploration of lesser-used armies I decided to take a Wolves of Isengard legendary legion. I figured a good v evil event at 555 points was the most viable event I was going to have to try the army, and set about painting and converting the last of the warg riders I needed to round out my force.

PhantomNuisance’s Wolves of Isengard list.

Minitrol (MT): Since my last event was 2018 I knew I had work to do. I did pre-match games read through the matched play scenarios and crafted a list capable of utilizing every phase. Also I included Heroic March. I also didn’t paint the army at the last minute.

Okay. So that’s obviously not true. What many people don’t know is that I am a Frodo at work, cool, impassioned and professional. But at home I am a Pippin – irrational, governed by emotion, and constantly dropping things down wells to alert hordes of stunted orcs…

So I had played one game this year which was using a different army, different points and different spirit.

Now to be clear the unusual dictates of the event required two good and two evil per team at 555 points. One team member bagging Dwarfs and the other two Evil I had to pick a Good force. This is is not my favourite in general terms I don’t really gel with any of the Good lists except the Fellowship:

In which our protagonist predicts the future

Despite PhantomNuisance’s appeals to logic “Take Beorn and the Eagles” I knew I had no choice; a long time ago PhantomNuisance gifted me the new Denethor sculpt and I had been itching for a chance to paint him.

I already had a fully painted Warriors of Minis Tirith force, so easy. Anyway long story short I ended up repainting and rebasing the entire army in 4 days again.

MiniTrol’s 555 Points of Shiny Metal Bois

Game 1: Domination

PN: My first game was against a Return of the King legion with Aragorn and the King of the Dead, with the rest of the force made up of Warrior of the Dead and a couple of Riders of the Dead. With high defence all around, and a free point of Might each turn with Aragorn I knew that I would have to rely on my mobility and numbers in order to win this one.

Two of my warg riders got a pre-game move and I tried to take advantage of my opponent’s positioning to kill his banner bearer with my throwing spears. It was a cheeky long shot which didn’t pay off but it made my opponent keep a good eye on his banner bearer for the rest of the game. In the first turn proper I landed a number of throwing spears on King of the Dead but failed to wound.

I also took the opportunity to cast channeled Fury with my Shaman as I needed the automatic passing of courage tests to charge the dead, and I figured the ‘prevent a wound on a 6’ would come in handy as the dead would normally be converting any wins to wounds as they were rolling against my courage value rather then my defence. The auto-pass courage served me well for the game; the wound prevention didn’t, including when Sharku went down to a shank from the King of the Dead.

My warg riders face off against the Dead of Dunharrow. I may have copped flack for including the Shaman in my list but he was worth every point in this match up.

I used my mobility to flank, I used my knockdown and numbers to win fights, but my real nemesis in this game was my inability to wound. My warg-riders needed 6’s in combat to wound while the throwing spears needing 6’s followed by 4’s and kill conversions just weren’t coming fast enough. At the end of the game I had killed only killed 6 warriors but due to fully controlling two objectives and contesting one other I managed to keep the game to a minor loss 4-7

MT: The night before we had discussed over a bizarre ice cream soda inspired beer the forced which would most give us pause (we had of course listened in rapt attention to the List review show HERE). One list I felt I had no tools to deal with was the Uruk Hai Fighting Legion with Ballista and Crossbows and tonnes of captains.

Very small chance of that we laughed.

It’s fair to say I had no control from the start of the game. The ballista killed Denethor the first shot and while I gamely took the objectives the numbers and my inability to keep my Shieldwall intact were telling. I used Might poorly and I had no clue what to do with Gandalf the White who I had never used before and was much less offensive compared to my Nazgul or Cave Trolls.

Clash of Pikes and Swords!

With not one point of my own claimed my Opponent romped home with a very solid 9 – 0.

Forward! Oh they have Heroic March… dang

Game 2: To the Death!

PN: My opponent in this game was running a Minas Tirith and Fiefdoms list which also included the Fellowship version of Boromir. My first objective was going to be closing the distance between our armies without taking too many casualties (including warg casualties) from the Black Root Vale archers which were arrayed against me.

The depth of field obscures just how much shooting I was facing down; I call it Art.

My concerns were well founded as the first turn saw both Sharku’s warg shot out from under him and the Shaman suffer a wound, though my flanking warriors were safely out of range and closing the gap quickly. In the movement phase of the second turn my opponent started tactical withdrawal moves, slowly moving his force backwards to keep out of range as long as possible. All the while shooting into my force, though this turn I fared a bit better as nothing hit.

The gap finally closed and fights about to begin.

Priority, in the third turn, went to me and in an attempt to negate my charge bonuses my opponent called a heroic move with Hurin. I countered with Sharku, got priority, and proceeded to charge. Boromir’s horse died to a throwing spear as I entered combat. Combat went well for me, including killing Hurin’s horse and watching him suffer a wound as he failed his Thrown Rider test.

Hurin prone on the ground after his horse was cut out from under him.

After that turn things quickly swung against me though as I lost both captains and Sharku in the same turn. I did kill Hurin and wound Forlong, and I broke his force in the turn which I was reduced to 25% however it wasn’t enough to avoid a major loss 4 – 10

MT: I was so excited about Game Two my opponent was and remains one of my favourites to play against over the years and the game was good fun, great banter, and high drama.

Men of Gondor! Forward!

I had no idea what to expect as this Moria horde contained a secret weapon – a Watcher in the Water.

My hope was to place pressure on getting supported fights to blunt his numbers and kill as many as possible before the Watcher broke through the surface as if it came behind me I would be ruined.

The Watcher emerged screaming turn 2.

Older and fouler

This was bad but it didn’t need to be the end! I still had Gandalf I had a solid block of Spearmen and warriors flanking and I could still butch the goblins. But I could not convert wounds yet the Watcher would kill three warriors a turn.

There was a tonne I could have tried but this was his game to lose and that wasn’t going to happen. A great game that taught me a lot. 10 – 0 to my opponent.

The Forces of Men in disarray

Game 3: Assassination

PN: This game saw me facing off against a Khazad-Dum Dwarf army. While it was slightly less daunting defense-wise than the Army of the Dead from my first game it was still not going to be easy. I also had a plethora of eligible assassination targets, and three heroes of my own to be the assassin (well, it was realistically only two as I was never really going to choose the shaman). My opponent and I had a good discussion about defence, wounds and fate at the start of the game (especially in regards to the two Heralds accompanying the King’s Champion and the Siege Veteran) and I decided to attempt to assassinate the Siege Veteran with my Red Captain.

My opponent deployed his army in a defensive line across the middle of the board and his ballista on the edge of a fountain, a defensible position which would negate my cavalry charges. I rolled a 5 for my pre-game scout move and took the opportunity to throw five throwing spears at the ballista crew, none of which wounded. We then proceeded to roll drawn priority a couple of times before the game eventually got started.

My warg riders quickly getting behind the dwarven line and launching throwing spears at the ballista.

As with the previous game Sharku had his warg killed from underneath him early on, but the battlelines quickly met and I started to get the upper hand, including causing a wound on one of the Heralds and making him use a Fate. It wasn’t long before my opponent had to call a heroic move to try and blunt my charge which I of course countered. Needing to take at least some sting out of the turn my opponent called a second heroic move which I countered again. As none of our heroes were in the centre of the frontline this ensured that we would each control the positioning at one end of the line. The following turn also saw a double heroic move called as my opponent tried to take a bit more control of the situation.

Things were going in my favour and I took the opportunity to get my Red Captain around the flank and heading towards the ballista. I continued to heft throwing spears at the Herald I wounded earlier to keep my opponent’s focus there. My opponent’s defensible position served him well, and it took a couple of turns until I was able to position myself, but I did get the Assassination kill.

The mighty fight of the fountain wall – I gave up all my cavalry bonuses to assault it and eventually it came out in my favour.

Casualties were mounting up on both side and my opponent and I both reached break point on the same turn. Things escalated quickly from there as almost a quarter of my force fled, and by the end of that turn I had taken enough casualties for the game to end. My valiant assassination efforts had got me my best result of the event so far, an 8-8 Draw.

MT: Not my favourite scenario for my perfectly narrative but weak as an upturned crab army list.

My opponent had 2 characters, I had three and one was Pippin and one had a Broken Mind so all in all there were no surprises for how the match played out. It was another Fighting Uruk-Hai list this time led by the White Wizard himself and Lurtz.

PN: #TrueWhiteWizard

Preparing to face their opposites

MT: I caught my opponent off guard as you can start deployment incredibly close so my Warriors and Gandalf flanked and prevented the crossbows’ from shooting while kicking down fools. Unfortunately, I had sudden second thoughts about what to do with Gandalf and kept moving out of harm’s way which was also out of the way of being useful.

I once again forgot to channel and cast Blinding Light which would have made such a difference. I had even written it on my hand (thanks to Opponent 2 for suggesting this).

Saruman orders his Uruks through the gap

I couldn’t really get the upper hand and despite inflicting reasonable casualties he Compelled Pippin into the open riddled him with crossbow bolts and I failed to do one single wound to Lurtz.

The White Wizard thematically sets Denethor on fire

Looked close on table but on paper was another 10 – 0 loss.

At the end of Day One the Shirrifs had 1 win, 1 draw, and 10 losses to our name, and from that result our team tournament goal was set – to finish with a triple digit victory point total.

To be continued…